

Polar Lights Model Kits: 1966 Batmobile Update
I showed images a while back of our Batmobile mockup. Unfortunately my stream of consciousness writing distracted some folks from the real point of the post- showing pictures of the Batmobile mockup.
Anyway, I figured I’d give an update. The step after the physical model is for the factory to scan the mockup into the computer. The files generated are then used to cut the steel tooling for the kit. Sometimes the digital model is done first as was the case of the Enterprise Refit. In the case of that model, the physical mockup was made from the files. I’m guessing the choice to make a physical mockup of the Batmobile was due to the way I delivered my instruction. Looking back, I supplied the details of the car as best I could but in the end it was kind of piece meal… or at least I think it might have been perceived that way. (either that or it was just information overload)
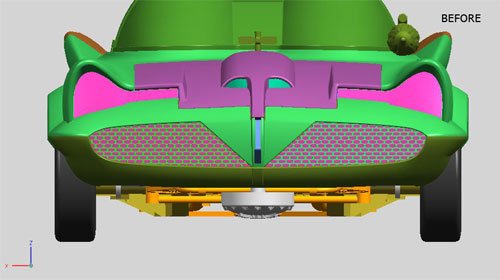
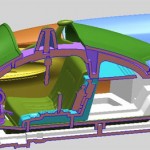
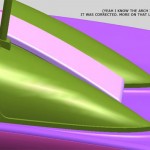
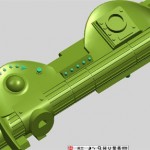
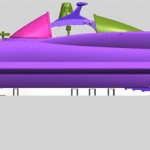
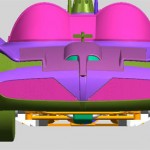
Once I saw the digital file, I figured that some more tweaking could still be done and be done easier than if I had asked them to change the mockup by hand. I had some edges rounded such as the window frames. This stage also showed a bit of misunderstanding about the track width. Oddly enough, the distance between the tires on the snap kit was accurate but for some reason, the glue kit’s tires had become separated too widely. This was an easy enough correction make though. Things like correcting the turn signals on the dash were a breeze. Probably the most significant last minute catch was the front wheel openings being way too wide. I’m not sure how that had been missed before. The front wheel opening on the real car is significantly wider than the rear but I felt this went way overboard. It was easy to spot in the computer-generated images because they were almost orthographic views. I was able to tighten the opening up a little bit. I also made the tires a touch bigger to fill the wheel wells according to the look of the ’66 period. One cool thing they showed me was a cutaway of the car. I knew how the parts went together but it was still cool to see so I figured I’d give a peak at it. Btw, pay no attention to some of the spoilers shown of some parts to be included in the deluxe version of the kit later next year. I’ve got just a few more elements of that kit to finish then the whole Batmobile project will be buttoned up. The tooling for the snap and glue kits is being cut right now.

Jamie – Will we see an iHobby Show report soon? Photos are surfacing on other websites of your new products, and I’d hate for them to steal your thunder!
We know news will leak out through the weekend. I’ll do report next week after the show. We sent buildups to the show that I didn’t even have time to take photos of.
WoW Jamie! It never even ocurred to me during this whole process that things could be fixed in the computer and it should have! Doh! So…I have to ask…what may this bode for the rear canopy? By my reckoning The rear or trailing edge of the canopy bridge, is about 16″ wide, and the leading edge is 12″ inches wide. Might this be fixed during the computer phase or is it too late?
Hi Jamie,
I attended Hobby Expo and wrote a review and pictures of Polar Lights Batmobile display and the complete Alex Ross Batmobile art. I mentioned you in the review. It’s a favorable review as you all have done extraordinary work and art.
I was sorry to miss you as they said you left after set up.
See the Expo pictures here if you scroll down:
http://1966batvehicles.yuku.com/topic/3908?page=26
Any idea when the White Road Boss is supposed to be out?
Website still says September…..but since it is the last week of Oct, that obviously isn’t happening. Any update?
Bats- There is some taper but It’s not that much. Sorry.
BatToys- I’ve seen you posts and I’m sorry I missed you too. I was there for setup, Sunday during the show and teardown.
Em City- I’m looking into it for you.
Any news on the White Road Boss? Still saying Sept on the website for release….however it is now Nov 4, and it is no where to be seen.
About resizing the tires…
Were the wheels resized, too, or just the tires? Was this done arbitrarily based on “looks right” or done accurately to 1/25 scale?
Will the chassis of the glue kit be true to the real Lincoln concept car or be a fantasy chassis featuring a jet engine as seen on the snap mock-up?
Patrick- re: the tires. It was a little bit of both. The tire sizing system has changed since the 60’s so we couldn’t nail down the exact dimension of the tires used on the show. We chose the dimension of a current tire size we felt was close but once installed on the digital mockup, visually they looked too small compared to photos of the car. So I basically put a photo of the car next to one of the digital images and advised the size change of the 1:25 scale tire.
The glue kit will come with a realistic chassis. We have done our best to incorporate eyewitness reports, the consensus history of the car and comparable period specific Lincoln vehicle chassis’ to create as close to real life as we could. No photos of the underside of the car from the era exist.
Thanks, Jamie! I looked at some photos of the real car after posting here and I think you nailed it. Did you ever think of consulting with Coker Tire for dimensions? They reproduce old tires in obsolete sizes.
Will that realistic chassis have the original Lincoln Futura engine or the later, swapped in Ford FE 390? Either way is a good answer to me but I’m still curious. I guess the Lincoln engine would be a slightly better answer since I don’t think it’s ever been done in 1:25 but there are loads of FEs.
Patrick-
The #1 Batmobile, was originally built as the 1955 Lincoln Futura showcar. Built in Turin, Italy by coachbuilder Ghia in 1954 the Futura was mounted on a then “experimental” chassis. Hess and Eisenhardt of Cincinnati provided the chassis. As limousine and ambulance builders they were accustomed to building chassis for unwieldy cars. They built the Chassis under the Kennedy limo as well as the Mark 2 hardtop-retractable, experimental car. H and E had six 1953 Lincoln chassis, all modified to what would become Lincoln’s standard chassis for 1955 and up. Two of the six chassis were to be used for the Mark 2 project but one of the planned cars was scrubbed due to budgetary constraints. The second chassis was sold back to lincoln for seventeen thousand dollars and the Futura was built on it. There were tubular steel cross members added to the chassis for strength (at Hess and Eisenhardt)but other than that the Batmobile has pretty much a 1955-56 Lincoln Premier chassis. Looking at the proto-photos, that’s just what they’ve done. I have some pics of the #1 cars chassis and they are close enough to appease this perfectionist! 🙂
Thanks, Bats! Where are the photos of the glue kit’s chassis? I only saw the snap kit and it had awkwardly short leaf springs and big turbine ducting for exhaust — perfectly adequate for a curbside but nothing like you described.
Here’s a link to the page you need. The ‘curbside’ you mention is the chassis for the snap kit.
http://1966batvehicles.yuku.com/topic/3969
Thanks, Bats! Yeah, that really looks great. And that looks like the 390FE under the hood. 😉
I can’t wait for this one!!!
I usually feel it’s bad luck to be superstitious…but I can’t leave this post at 13…I don’t want ANYTHING to jinx this kit! 😉
You’re very welcome Patrick. Now you can see why i’m Jamie’s biggest fan right now. Considering the language barrier and all else he has had to deal with to push this project through, I think he and all the guys who’ve had a hand in it deserve mucho kudos for the job they’ve done. Now if spring would just get here!
Jamie, I went back and re-read this post. I don’t know how I misunderstood the process. I was probably too focused on seeing the preview of kit. I can clearly see now that the development of this kit started in China.
Good call on the front wheel opening and you did nail the tire’s overall diameter; just the wheel rims are too small. I think the CAD had the wheel/tire diameter in proportion but both needed to be enlarged. The rear wheel opening is obviously pinching in on the tire, too, but I didn’t see it as clearly then as I do now that I’ve built the kit and photographed it to match the original. Too bad the factory didn’t take that simple step before going into production.
The stuff on top of the driver’s side of the dash also seems more defined in the CAD image than my kit’s part did. The CAD image looks like a fresh bar of soap with sharp corners and crisp letters and the part in my kit looks like the same bar after about 20 showers. There were no discernible bezels around the compass or the transmission indicator lights.
Like they say, hindsight is 20/20…