- 1/25 scale, skill 2, paint & cement required
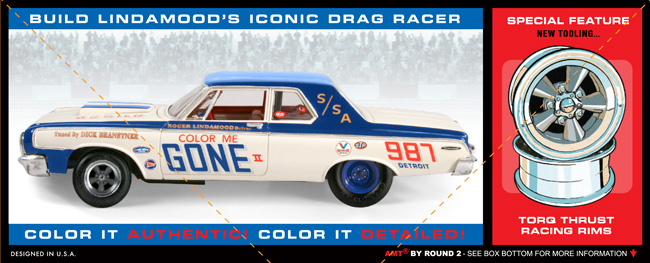
- Iconic drag racer
- Authentic detail inside and out
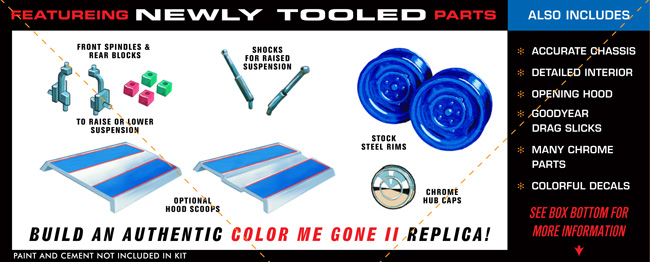
- Opening hood
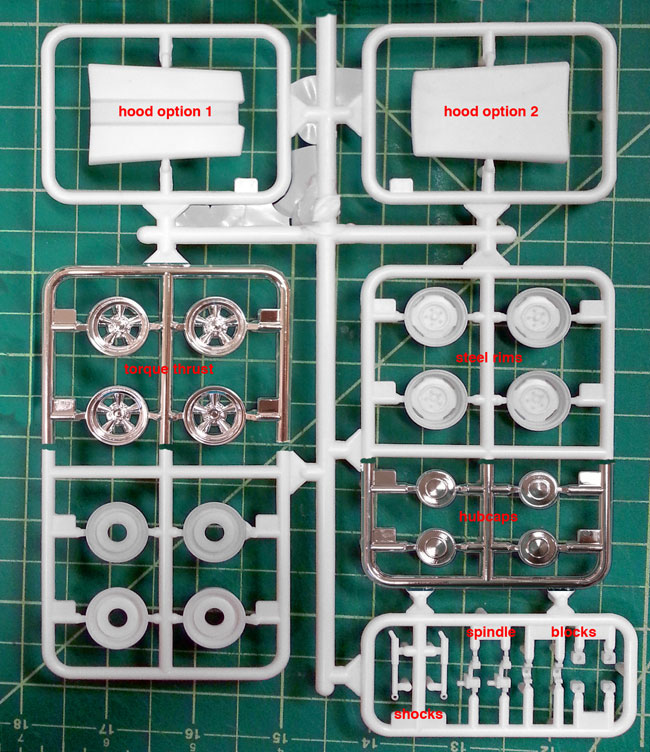
- White, chrome and clear parts
- Goodyear drag slick rubber tires
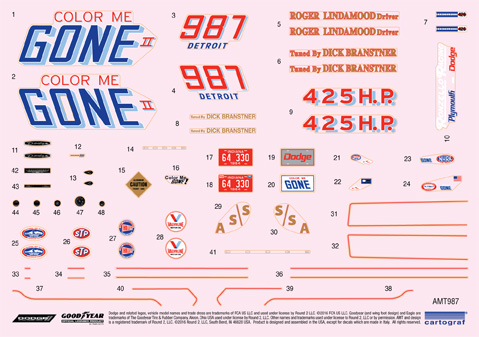
- Full-color Cartograf decals
- SPECIAL FEATURE: Newly tooled Torq Thrust racing rims, stock steel rims, hubcaps, and multiple hood scoop options!


Posts Tagged ‘model kits’
AMT Model kits: 1964 Dodge 330 Color Me Gone!
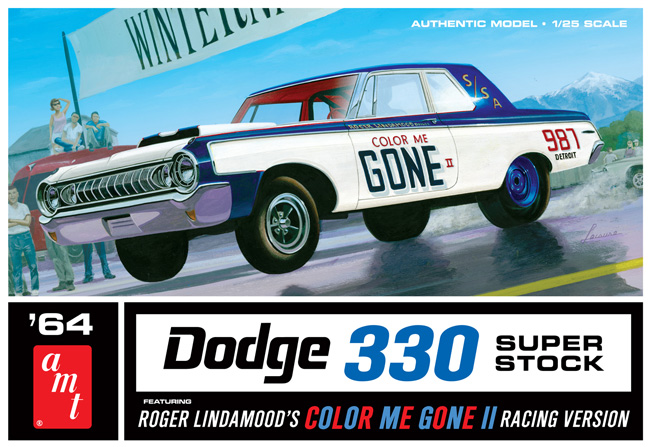
Racing down the track this month from AMT is the 1/25 scale 1964 Dodge 330 Color Me Gone. A historic car in drag racing lore, the 1964 Dodge 330 Color Me GONE was built and driven by Chrysler transmission lab tech Roger Lindamood. Implanted with a 426 big block, the car could hit a 12 second quarter mile. AMT puts this kit on the starting line. It features white, clear and chrome parts with rubber tires. An illustrated instruction sheet assists assembly and a full color decal sheet rounds out the product.
Get yours before it’s GONE!
***We’ve gotten reports that the boxes say “300” rather than “330”. We are aware of that and we will make a correction on future production runs.
Save
1:32 Kitbash: 1930 Ford Model A Roadster Pickup – Part 3
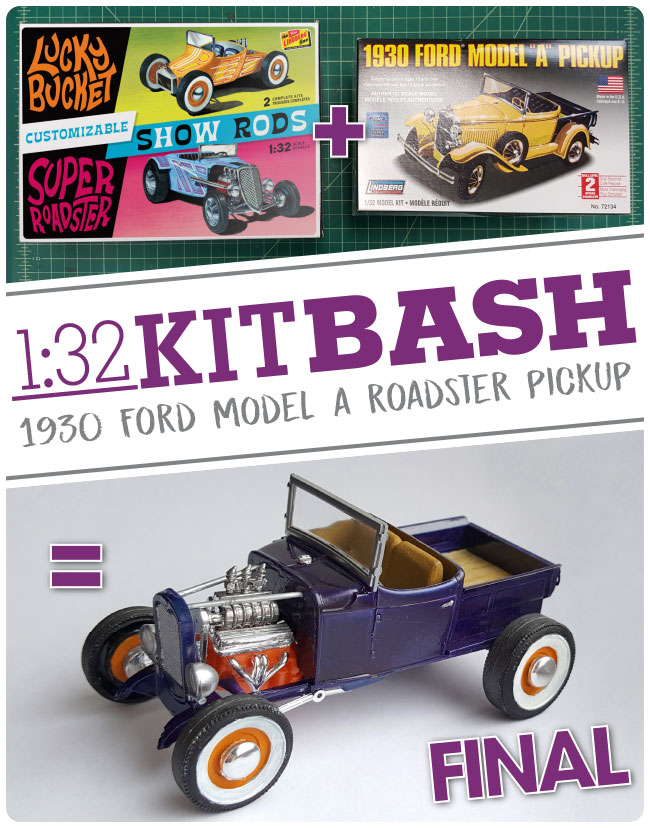
This is the final part of my 1930 Ford Model A Roaster Pickup kitbash using the Lindberg 1:32 Customizable Show Rod 2-pack and Lindberg 1:32 1930 Ford Model A Pickup.
Parts are painted, now it is time for assembly.
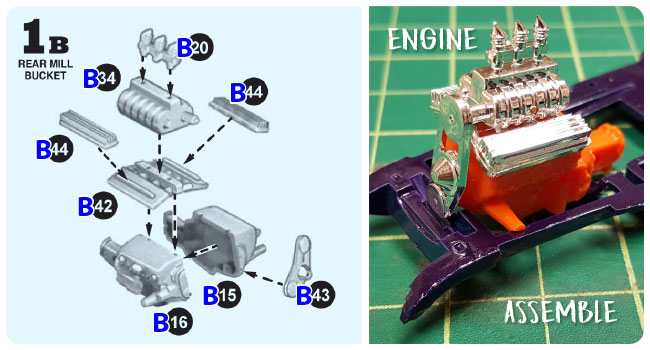
As mentioned in part 2, I assembled the motor using the “Rear Mill Bucket” instructions. As shown above.
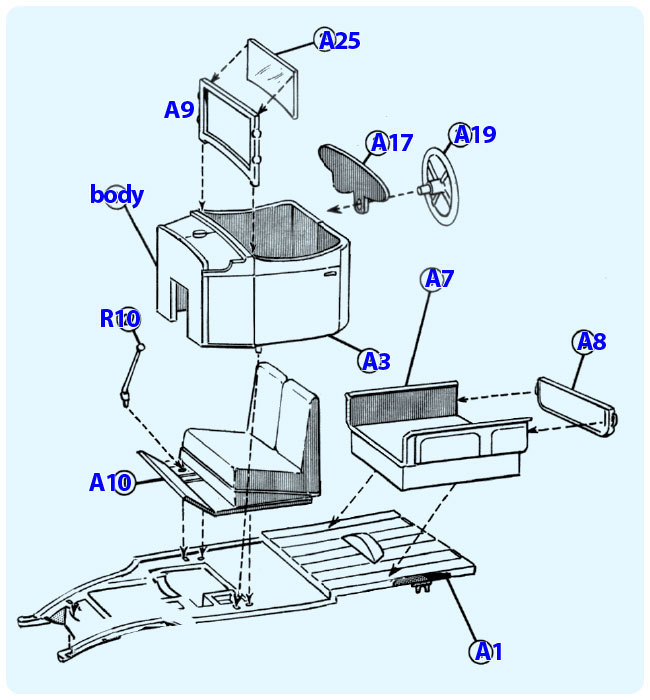
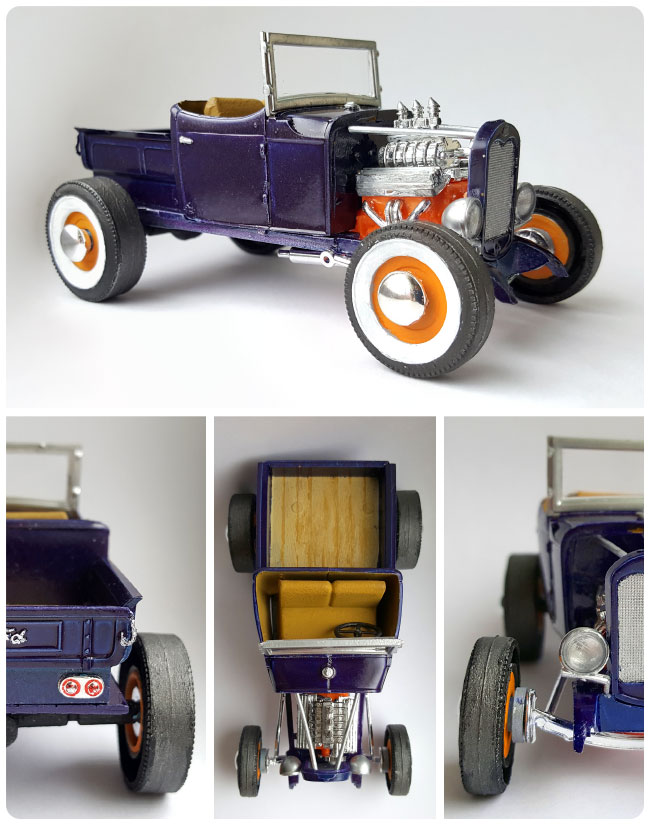
Next I assembled the frame (A1), body (A3+A4+A5+A6), dash (A17), steering wheel (A19), windshield (a9), glass (A25), bed (A7a), grille (A2), tail gate (A8), and interior of the cab (A10) as shown in the Model A Pickup instructions. I replaced the gear shift with the chromed one from the Super Roadster (part R10).
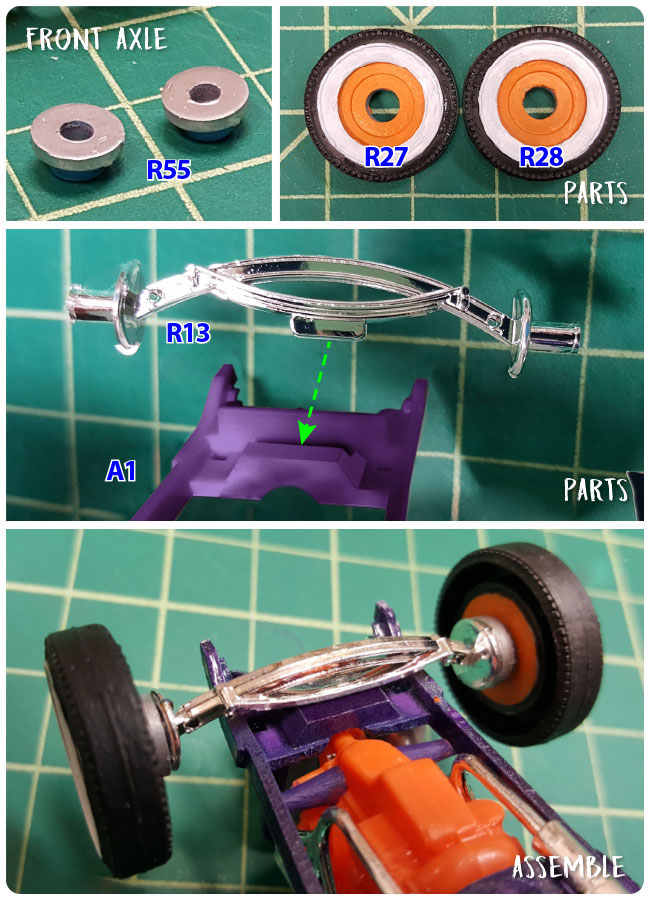
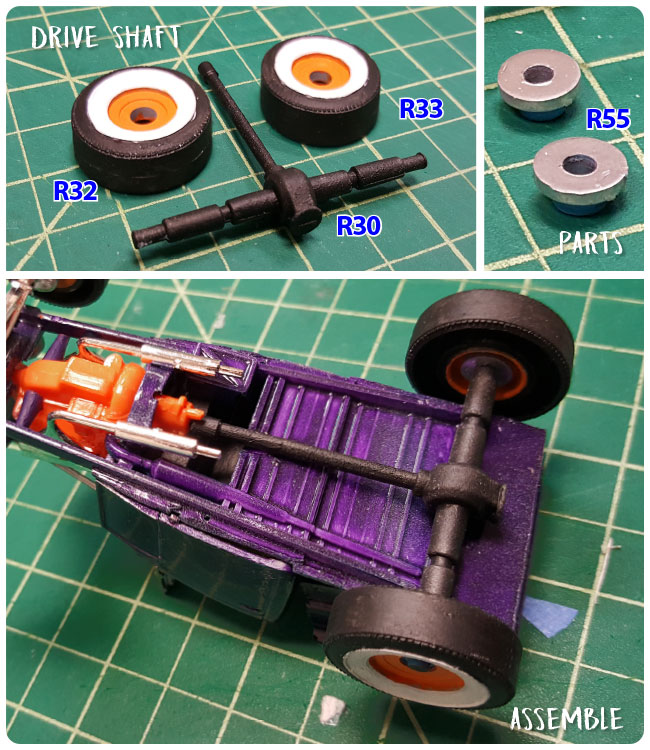
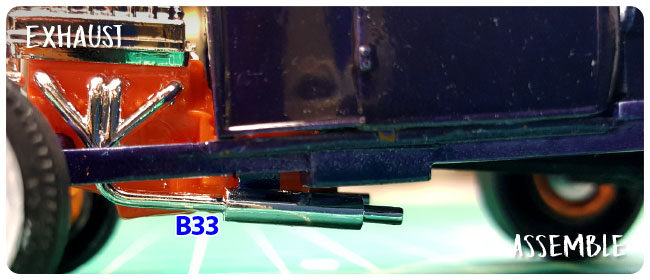
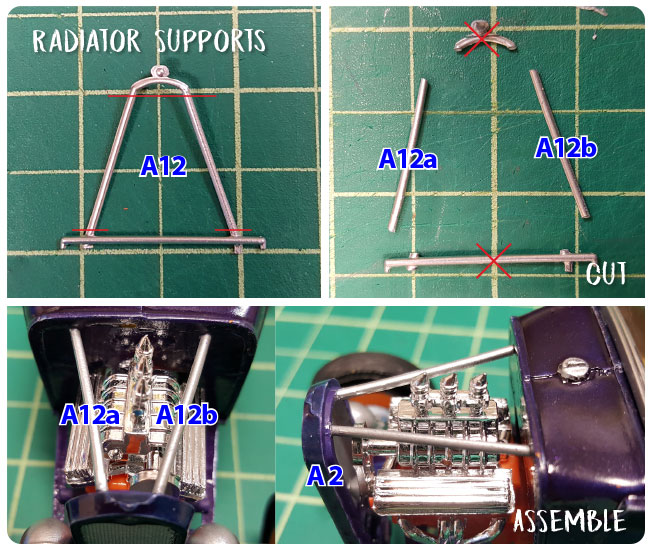
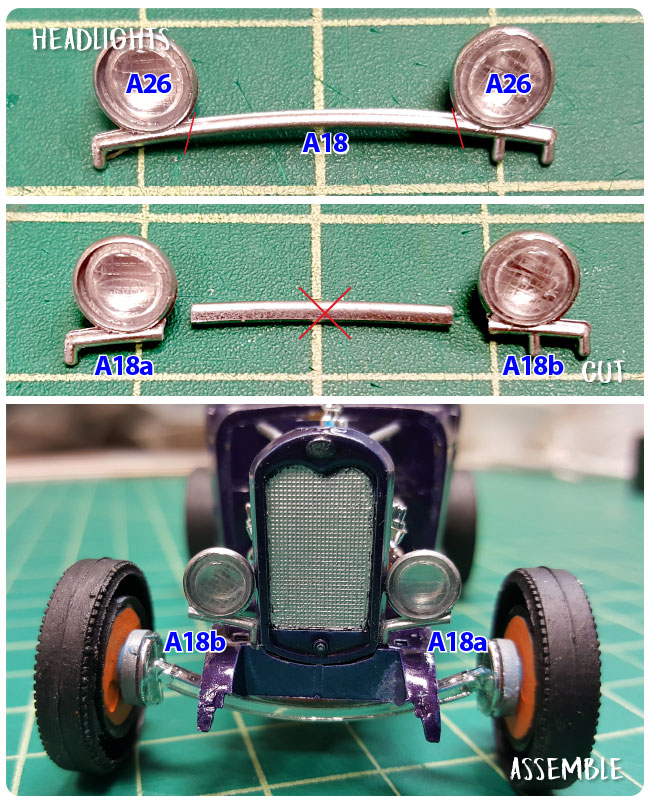
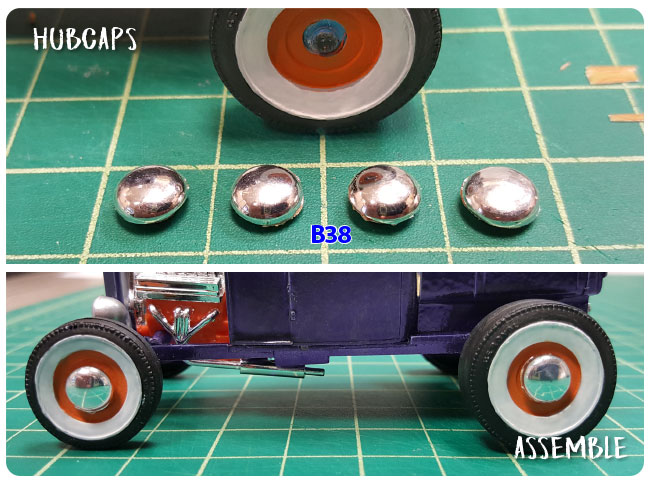
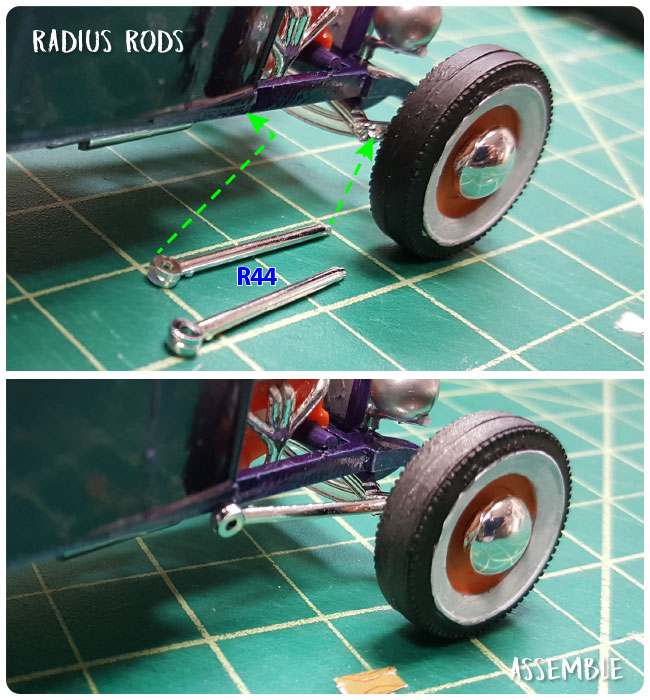
1:32 Kitbash: 1930 Ford Model A Roadster Pickup – Part 2
Goto PART 1
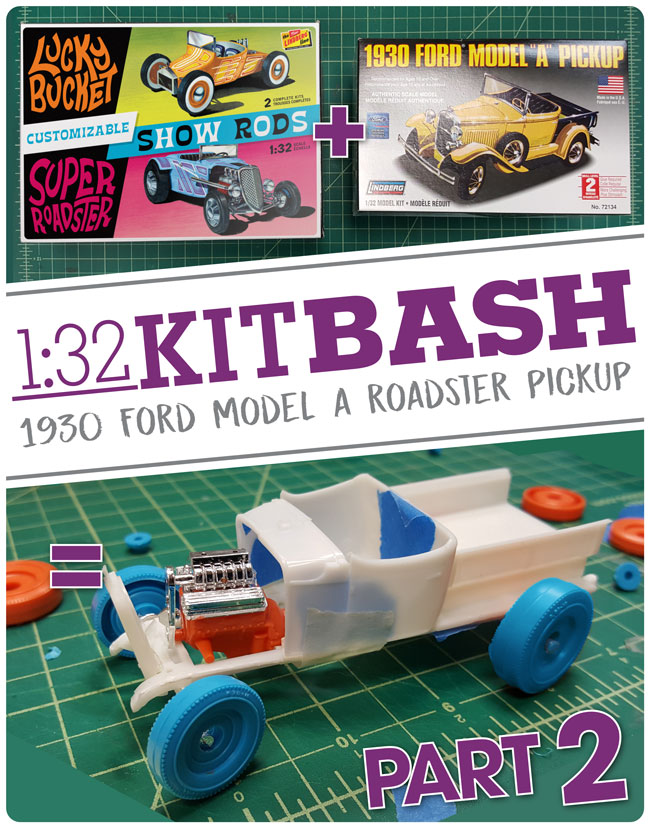
This is part 2 of my 1930 Ford Model A Roaster Pickup kitbash using the Lindberg 1:32 Customizable Show Rod 2-pack and Lindberg 1:32 1930 Ford Model A Pickup.
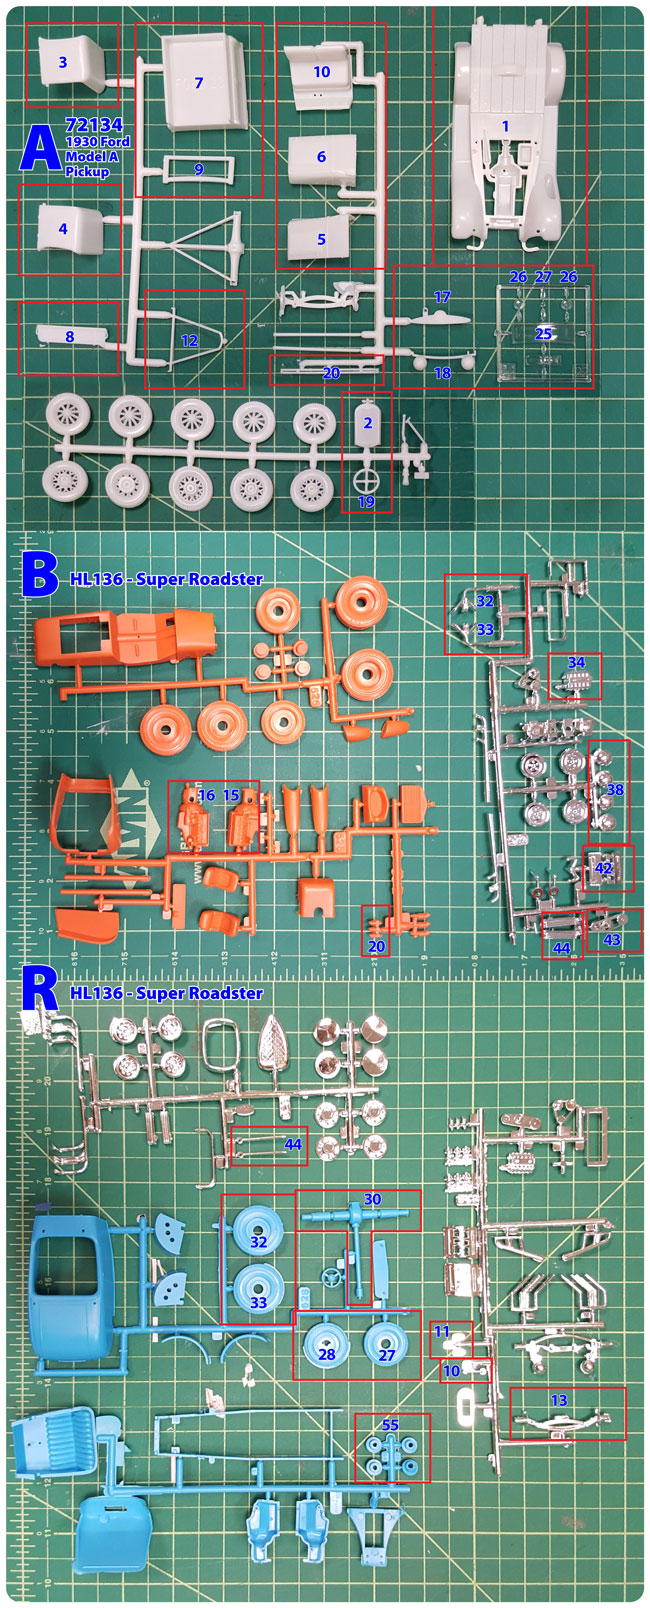
Above are the parts from each kit that were used. Note that I will reference 1930 Ford Model A Pickup kit part with an “A” in front of the part number, “B” for the Lucky Bucket and “R” for the Super Roadster.
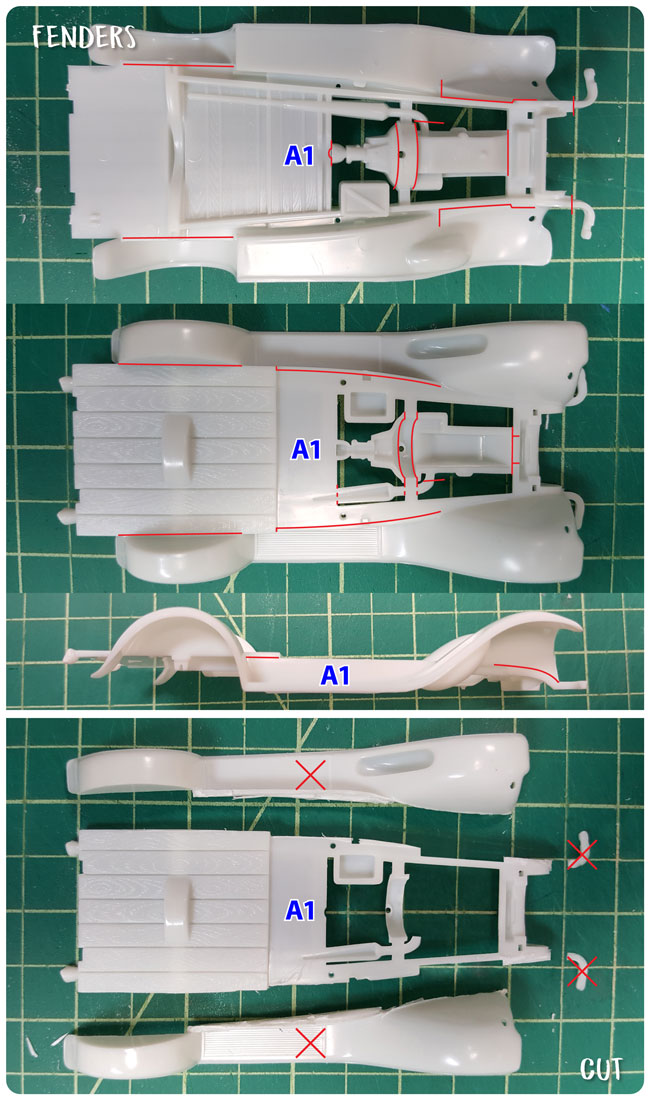
First I removed the fenders from the frame (A1). Cutting along the the red lines as shown above. I discarded the fenders (i.e. set them aside for future projects).
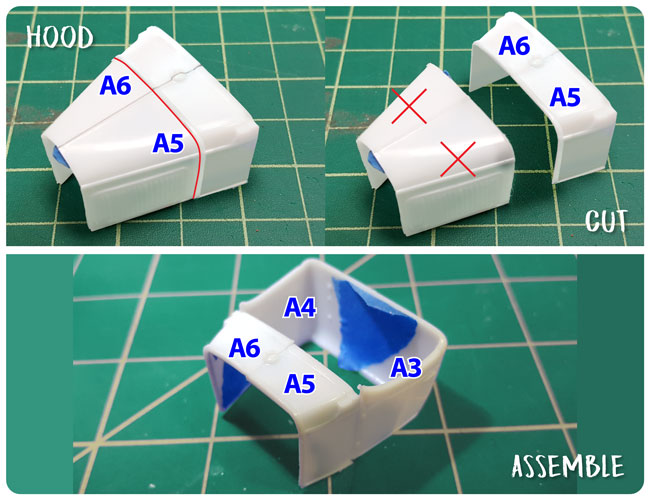
Next I separated the hood from the cowl halves (A5,A6), cutting along the red line. The hood halves were not used on this build, so discard. The cowl halves (A5,A6) and the body sides (A3,A4) were then glued together.
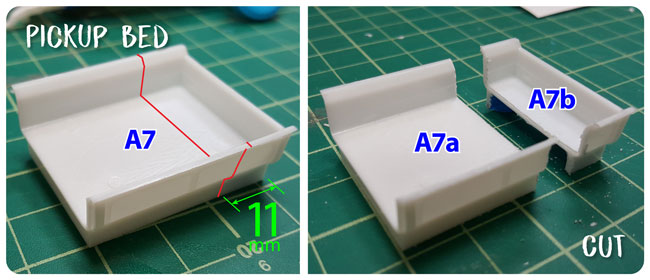
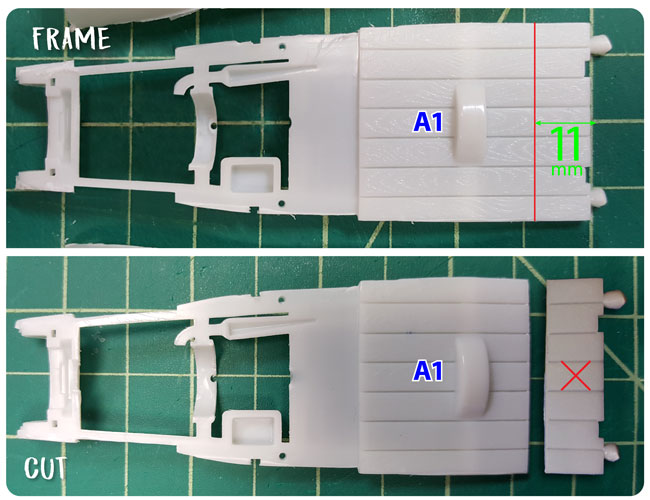
I wanted to shorten the pickup bed (A7). The excess is be used in next step, so you would need to remove at least 7mm, I went with 11mm. I will refer to the halves now as parts A7a and A7b. I also trimmed 11mm off the bed on frame (A1). The excess from A1 is discarded.
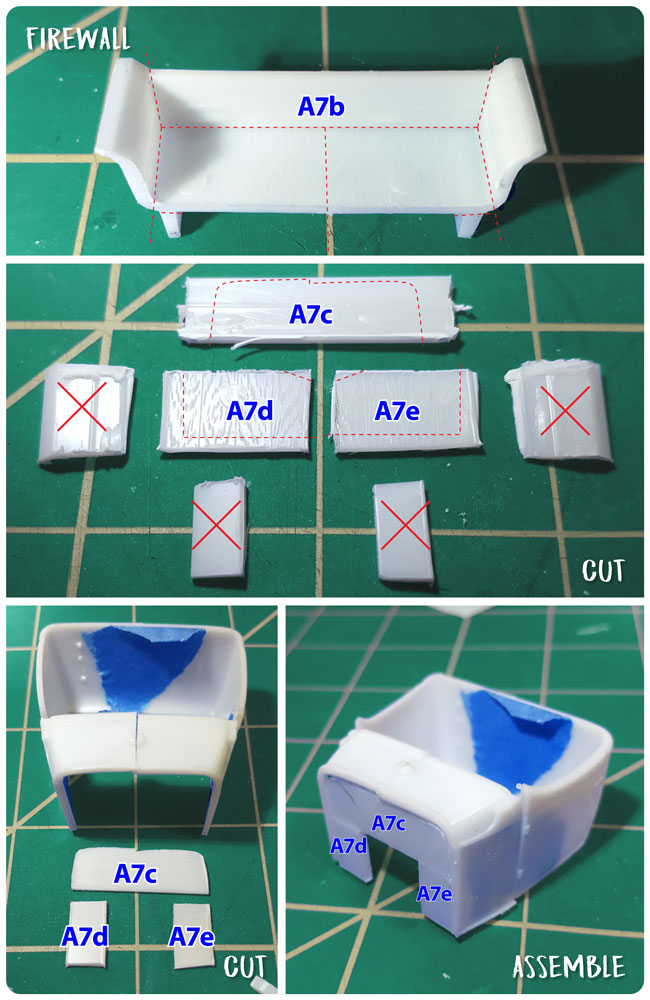
The body (A3+A4+A5+A6) is missing a firewall so I used part A7b to create it. I cut it into the pieces shown above and then cut 3 pieces down to fit in the cowl (A5+A6). The pieces were about 7mm wide and A7c was cut to fit the curve of the cowl. Parts A7c, A7d and A7e were glued to the body.
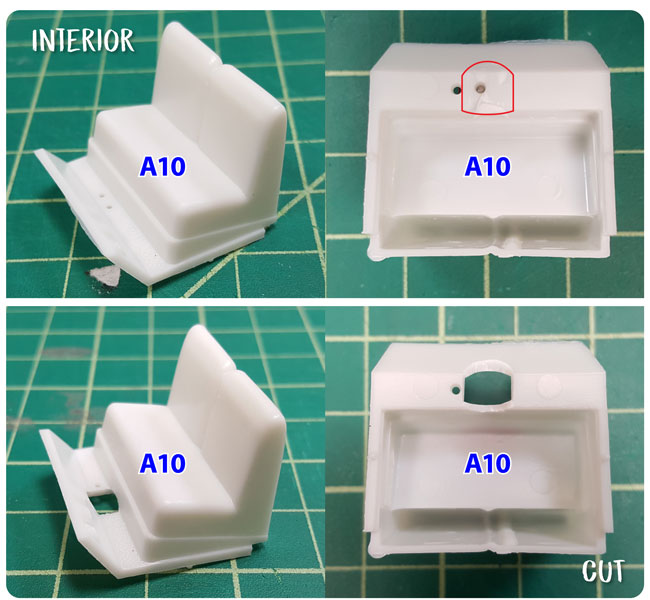
Next I cut a “hole” in interior’s floor (A10) to make room for the drive shaft (R30) from the Super Roadster.
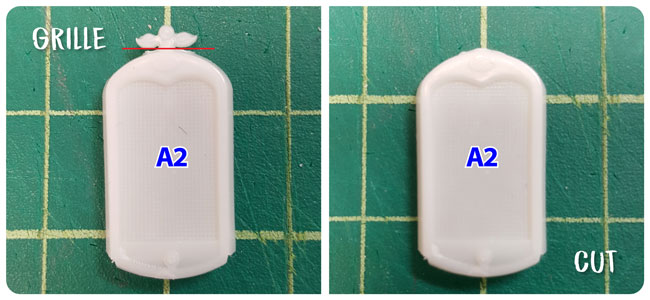
I cut the hood ornament from the grille (A2). I didn’t like it.
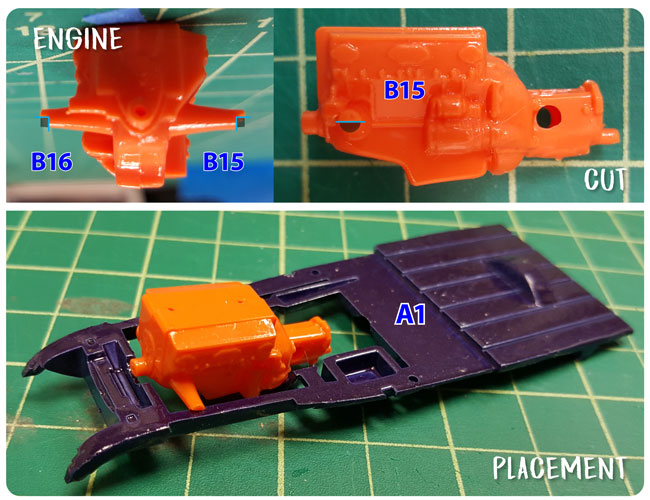
I used the motor halves (B16,B15) from the Lucky Bucket. I cut a half circle from the end of the support rods that enable the engine to sit perfectly in place on the frame (A1) with very little modification. Note I had to cut a half circle notch off the frame at the front of the engine to leave room for the belt (B43). For the motor assembly I used the “Rear Mill Bucket” version, option B on the instructions for the Lucky Bucket, but with different exhaust. I will show this in my next post.
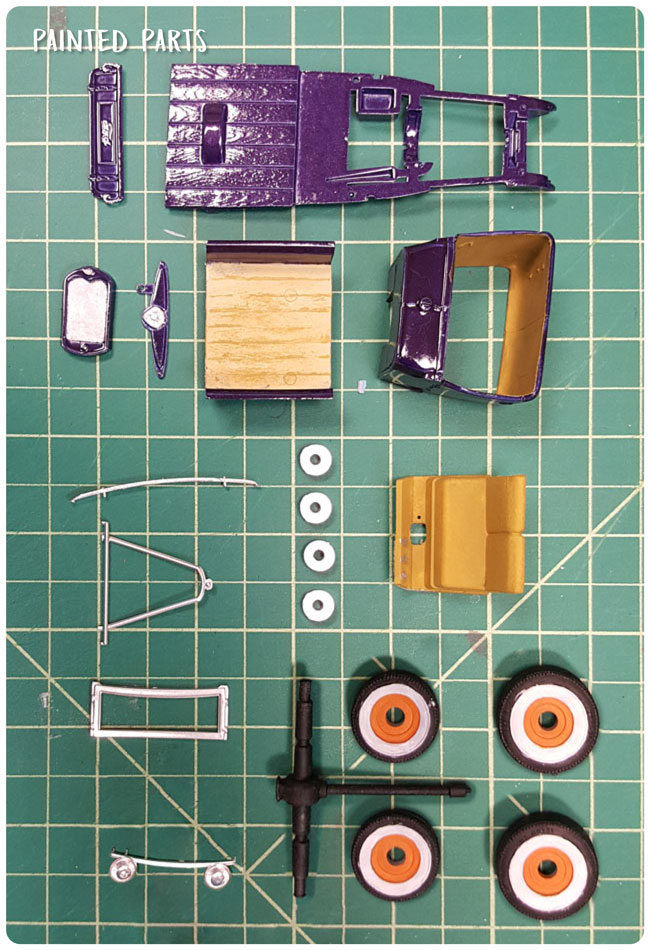
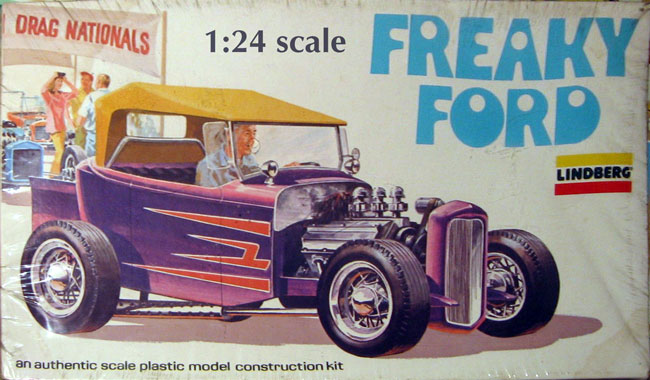
Next I painted the parts as shown above. My paint scheme was inspired by the vintage Lindberg Freaky Ford kit. (as mentioned in Part 1) I painted the frame (A1), body (A3+A4+A5+A6), dash (A17), bed (A7a), grille (A2), and tail gate (A8) a metallic grape purple, first hitting them with a dull medium blue then the purple to give the color a little more depth. I painted the wood planks on the bed to look like wood and the grille and gauges chrome. The interior of the cab and the seats were painted tan. The front radius rod (A12), headlight assembly (A18), bumper (A20), windshield frame (A9) and 4 wheel hubs (R55) were painted chrome. The small front wheels (R27,R28), rear wheels (R32,R33) and drive shaft were painted black. The rims on the wheel were painted orange and whitewalls were added.
Look for my next post for final modifications and assembly.
1:32 Kitbash: 1930 Ford Model A Roadster Pickup – Part 1
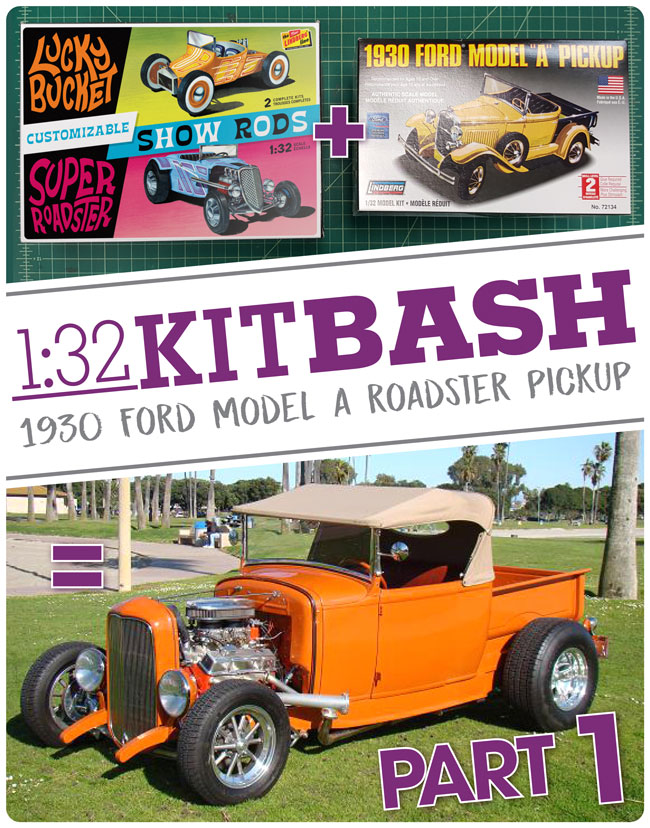
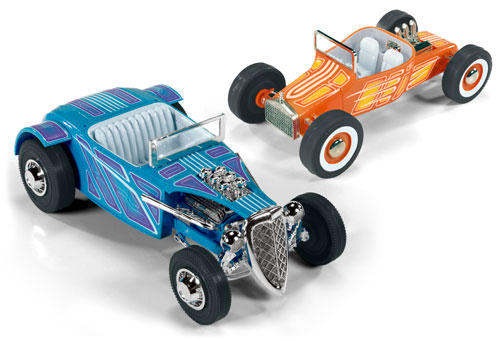
As mentioned in a previous post the Lindberg 1:32 Customizable Show Rod 2-pack will be out soon and one of the cool features is the many parts that can be used to customize the kits – 125 parts to be exact! The kit includes instructions to build the 2 cars in three different ways but with the parts being interchangeable you could customize many more.
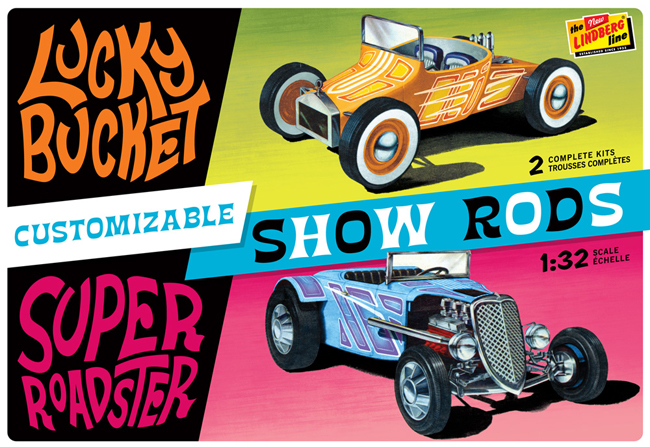
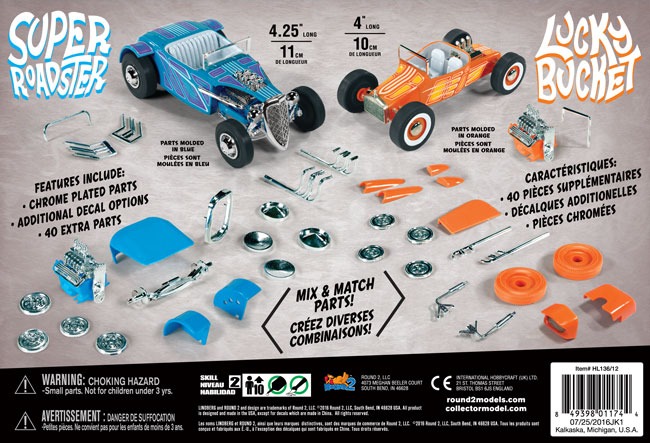
Often not seen in 1:32 car kits are detailed engines and the Show Rod kit includes 2. I realized the Lindberg line has many older 1:32 releases that could be kitbashed with the Show Rods. My goal is to use the parts in the new release to customize the Lindberg 1:32 1930 Ford Model A Pickup, item number 72134. For the paint inspiration I will use the 1975 boxart of Lindberg 1:24 Freaky Ford. Check out my next post to see my progress.
Save
Lindberg Model kits: 1959 22ft Owens Deluxe Cruiser Boat!
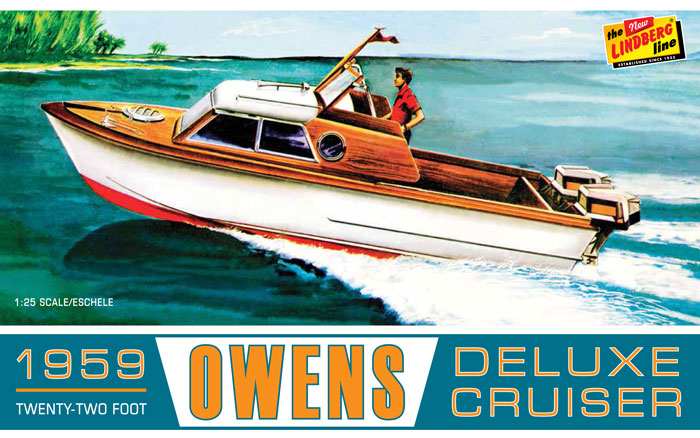
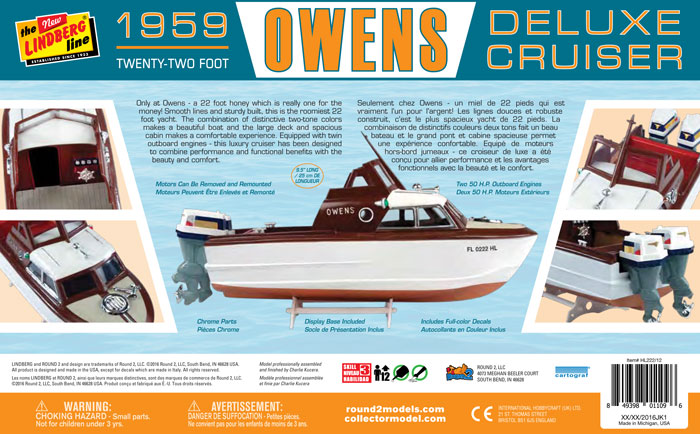
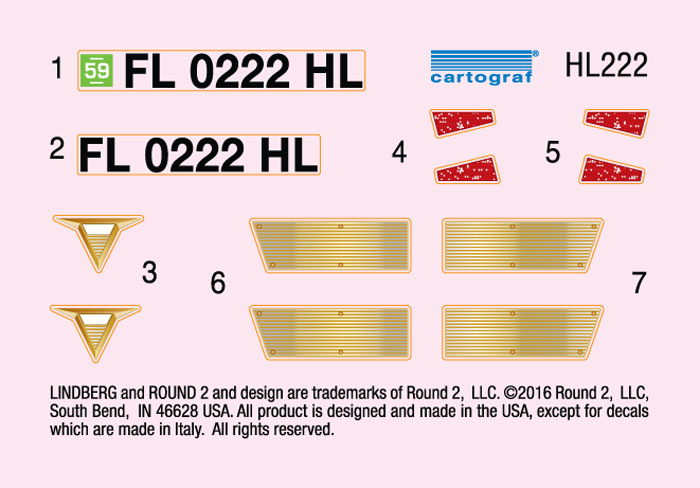
Following the release of the 1959 Century Coronado, we have the 2nd boat found hidden in the Lindberg tool collection — the 1959 22ft Owens Deluxe Cruiser with Twin 50HP Outboard Motors! With smooth lines and sturdy built, this is the roomiest 22 foot yacht. The combination of distinctive two-tone colors makes a beautiful boat and the large deck and spacious cabin makes a comfortable experience. Equipped with twin outboard engines – this luxury cruiser has been designed to combine performance and functional benefits with the beauty and comfort.
Like the Coronado the Owens boat also is connected to another famous designer, Raymond Loewy. Raymond Loewy was know for creating logos for Exxon, Shell, BP, TWA, Nabisco, Quaker, and the U.S. Postal Service. He created the USCG stripe as seen on Lindberg’s US Coast Guard Patrol Boat. Most notably he redesign the glass Coke bottle, replacing the embossing with white letters and changing the contours to create the iconic shape we know today.
Star Trek Model Kits: U.S.S. Enterprise D & Aztec Decals sneak peek
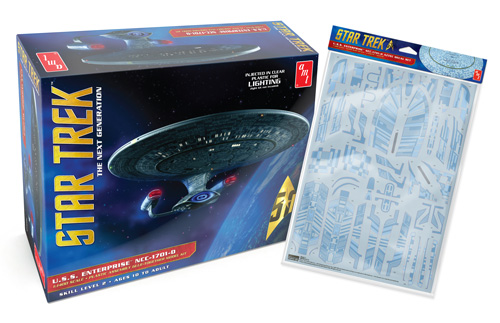
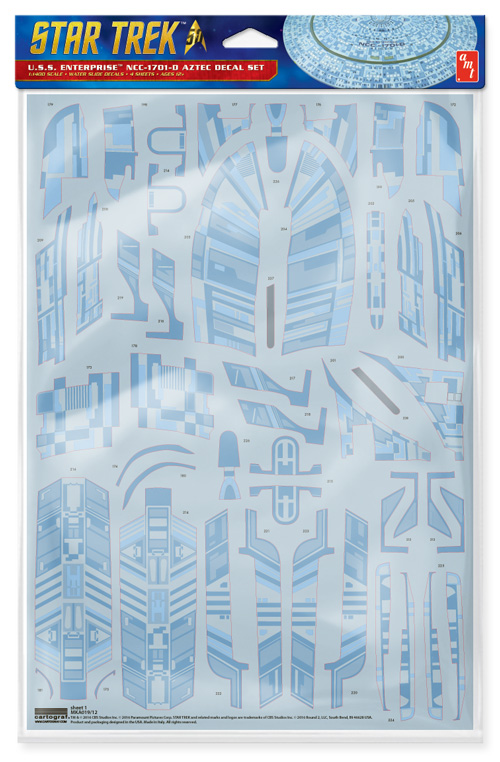
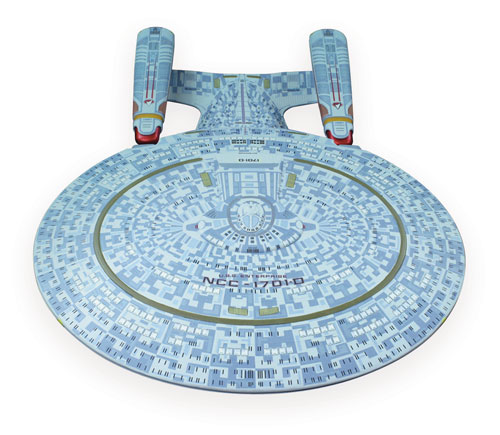
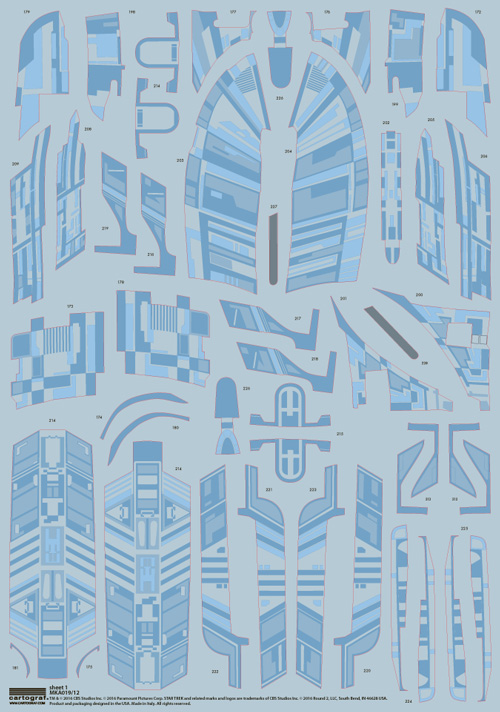
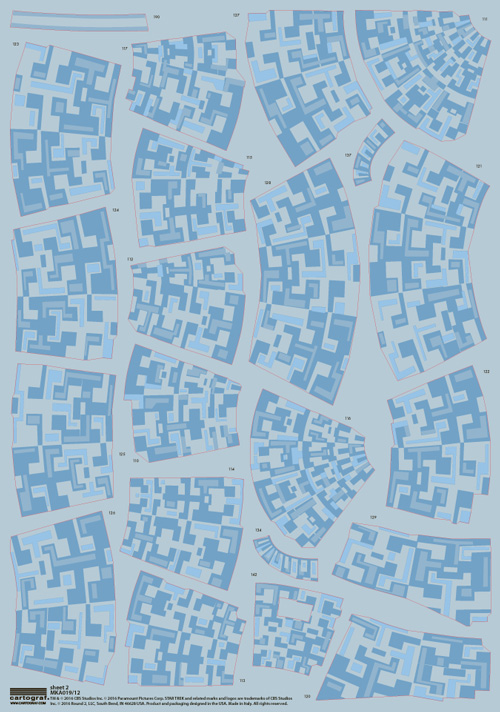
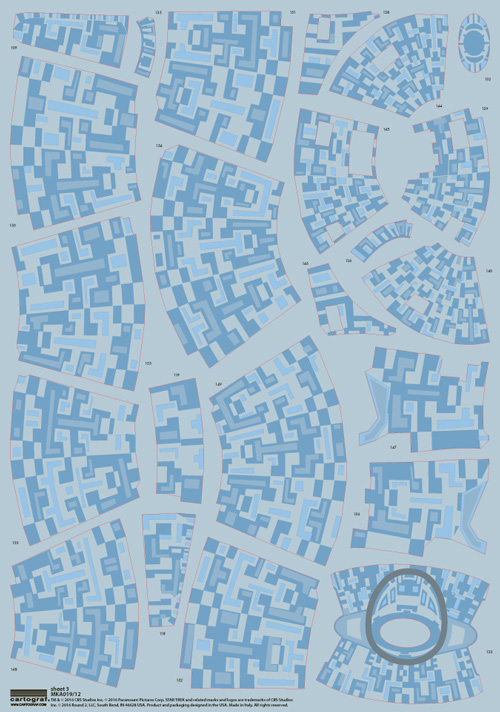
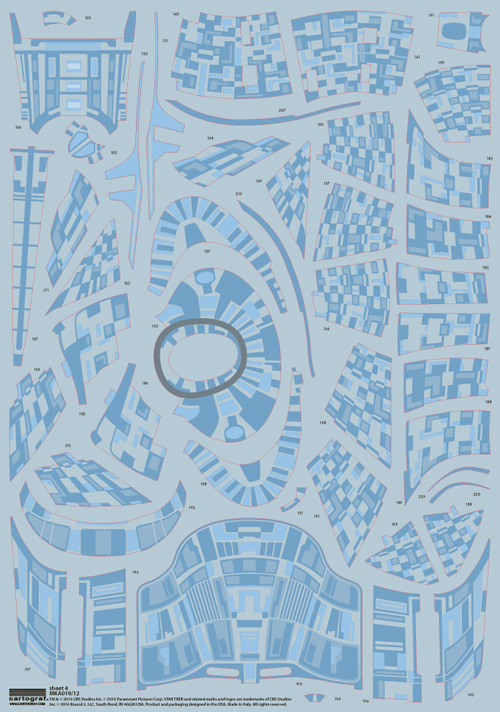
Here is a preview of 2 upcoming Star Trek releases, the AMT955 1:1400 U.S.S. Enterprise NCC-1701-D kit and the Aztec decal set for that kit. They will be sold separately.
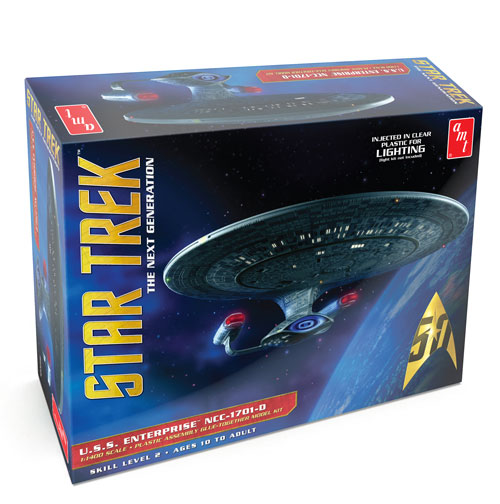
The U.S.S. Enterprise NCC-1701-D model kit will be coming out first. This all-plastic model kit is 18 inches long when fully assembled, and features a removable saucer section and dome base with metal support rod. This special edition is molded in clear plastic, which allows the modeler the option of lighting the kit. (Light kit not included.) Also included are standard marking, pennant, registry, and lifeboat decals; and complete instructions.
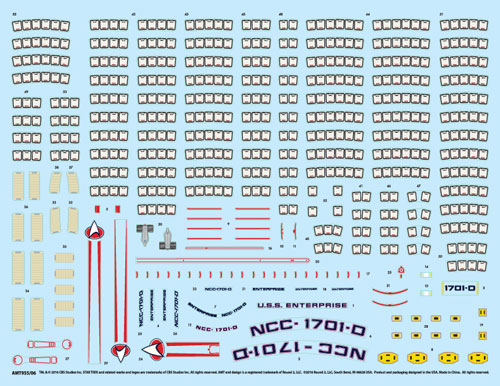
The 1:1400 U.S.S. Enterprise NCC-1701-D Aztec decals will be released shortly after the base kit. The set will include 4 – 9.25 x 13.25 inch decal sheets and placement instructions. If you pick up the Enterprise D kit make sure you don’t miss out and keep you eyes out for the Aztec decals!
Lindberg Model kits: 1620 Pilgram Mayflower!
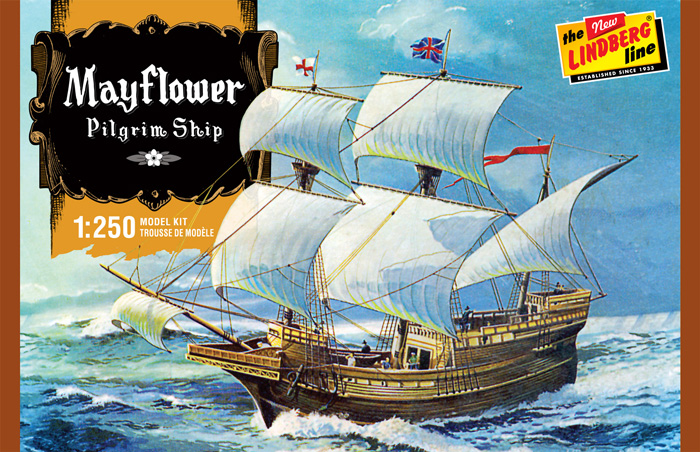
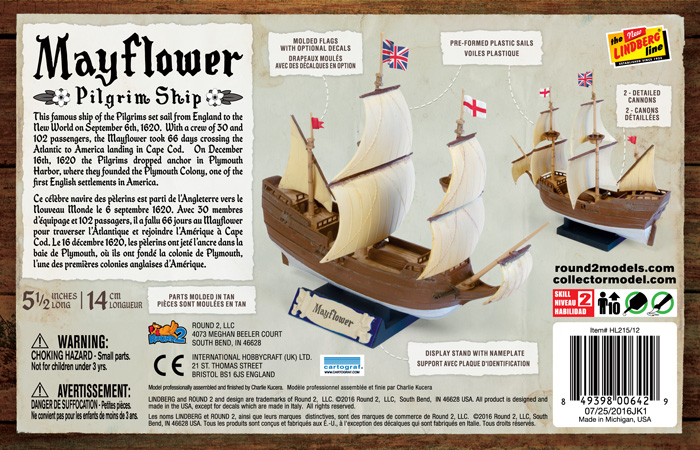
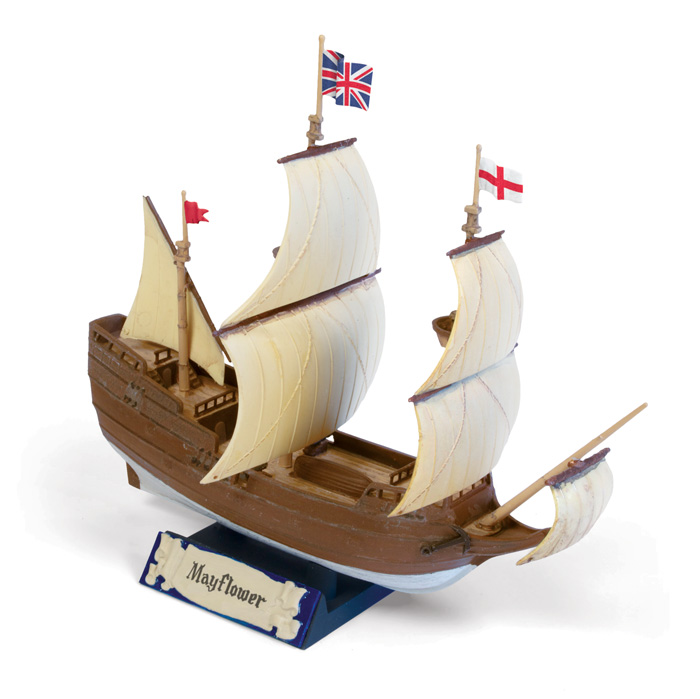
This month set sail with the Pilgrims on the Mayflower. Build this 1:250 replica of the famous ship that establish the first English settlement in the new world. The Mayflower is joining Lindberg’s growing fleet of small scale sailing ships. At 5.5 inches long the kit is packed full of detail with molded flags, preformed sails, decorative hull and wood grain deck.
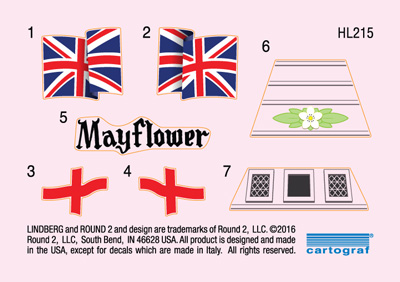
The Mayflower includes new packaging featuring the 1963 boxart, easy-to-follow instructions, display base with nameplate and Cartograf decals. The new decal sheet includes flags, name for display and stern decoration.
Lindberg Model kits: 1959 Century Coronado Boat!
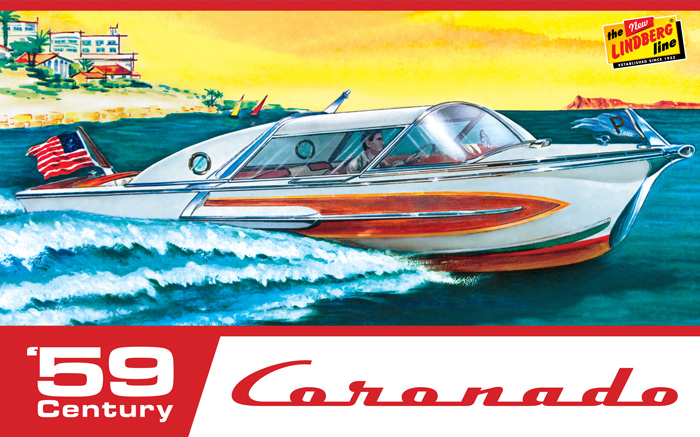
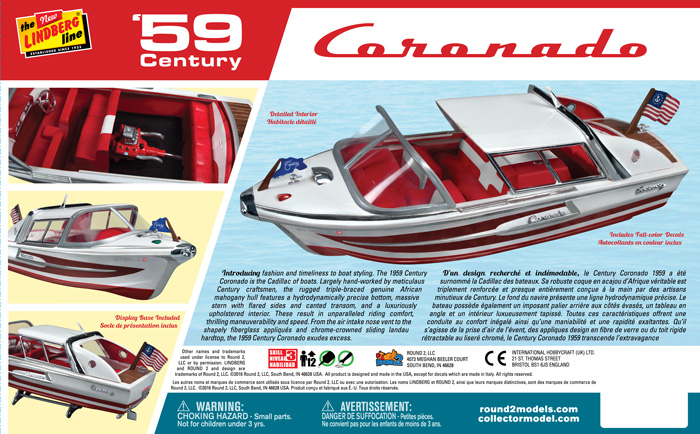
For those fans of mid-century chrome and bubble tops Lindberg has a kit for you. We found a few boats hidden in our tool collection that haven’t been seen since the 1960s and the first one to be released is the 1959 Century Coronado. The 21-foot Coronado was the flagship of Century’s line of runabouts and was known for its luxury and styling. The boat was designed by Richard Arbib, mostly notable for his watch and automobile designs, including the 1957 Hudson Hornet. If you would like to know more about the Coronado and see some pictures check out “The Cadillac of Boats”on WoodyBoater.com. Also check out some of the articles at Forgottenfiberglass.com or CarStyling.ru about Richard Arbib’s car designs.
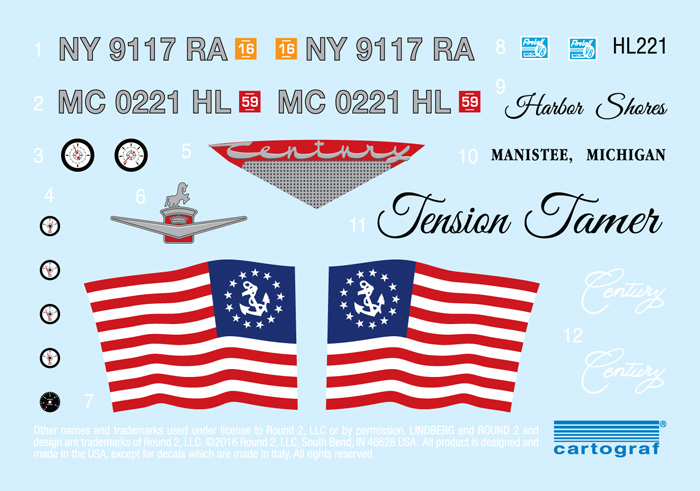
Features include: full color decals, vintage boxart, display base, chrome parts, plastic flags, sliding canopy, and a removable engine cover.
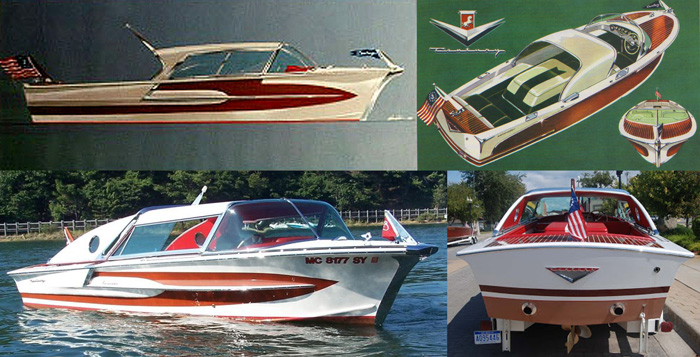
Above: Richard Arbib’s Coronado designs and photos of the real thing. Below: More of Arbib’s designs including the 1957 Hudson Hornet, the 1952 Packard Pan-American Roadster, the 1954 Ford Atmos, and the 1956 Astra-Gnome.

Lindberg Model kits: 1:32 Customizable Show Rods! A Brief History
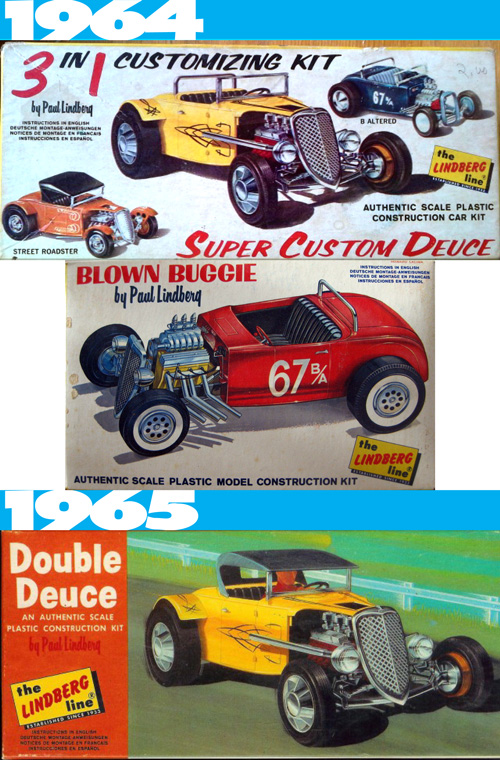
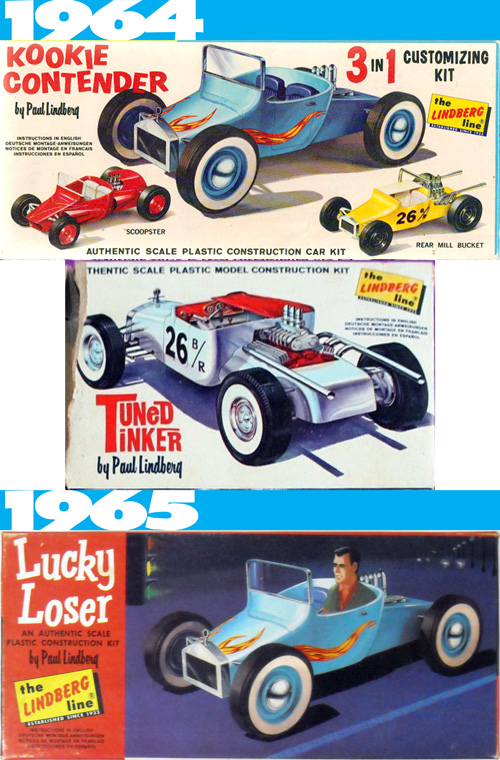
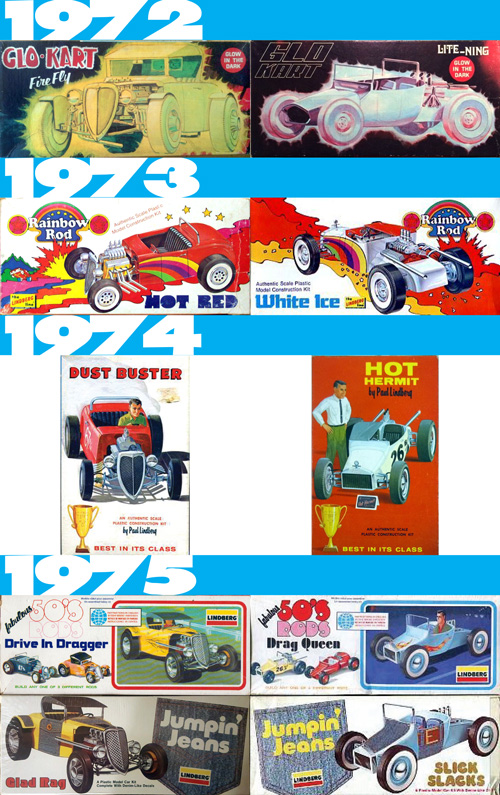
We have a 2-pack of 1:32 Customizable Show Rods that will be coming out soon under the Lindberg model kit line. The pack includes a 1930s roadster and a 1920s rear-engine bucket that include a slew of interchangeable parts, so you can customize to your heart’s content. These fun little kits were originally released separately in 1965 as part of a series of 4 kits. The Roadster was released as the Super Custom Deuce, a 3-in-1 kit including Street Roadster and B Altered variations, and as the Blown Buggie. The Bucket was released as the Kookie Contender, a 3-in-1 including Scoopster and Rear Mill Bucket variations, and as the Tuned Tinker. Over the next 11 years Lindberg put out 6 more versions of each kit. Notable releases include the hard to find Glo-Karts in ’72, Rainbow Rods in ’73, and the blue jean themed Jumpin’ Jeans in ’75. Because who doesn’t want their hot rod covered in denim?
Now for the FIRST TIME EVER the new release will include chrome parts! The rest of the parts come injected in bright, bold colors. The kits will each include 2-3 options for grilles, headers, carburetors, front suspension, and hubcaps. Additional parts include a soft top, scoops, blowers, tires, front & rear fenders, rear bumper, tail lights, and roll bars. The large decal sheet is all new featuring funky show rod patterns and multiple options for customizing. Given all the options for these kits I am excited to see what modellers will do with them.
Roadster…
Bucket…
1970s…
Lindberg Model kits: New Instruction Sheets
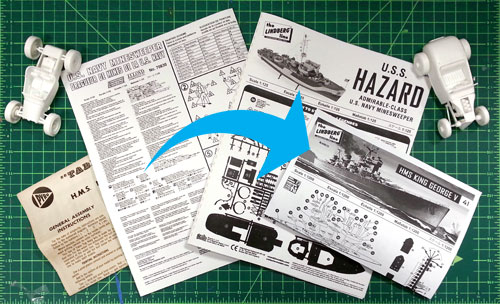
One of the great features in the new Lindberg and Hawk releases are the improved instruction sheets. We want modellers to have fun with our kits and the instructions are a large part of that experience.
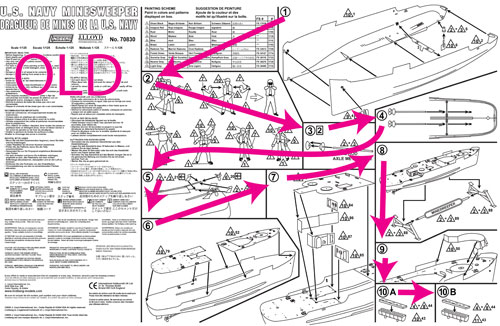
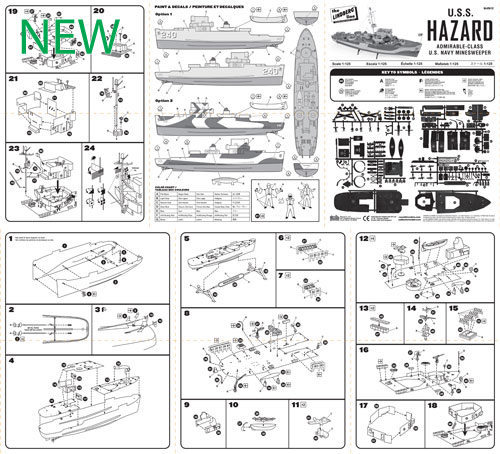
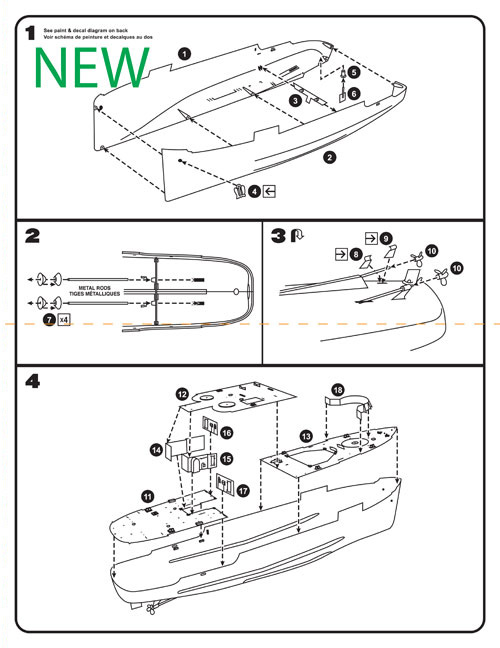
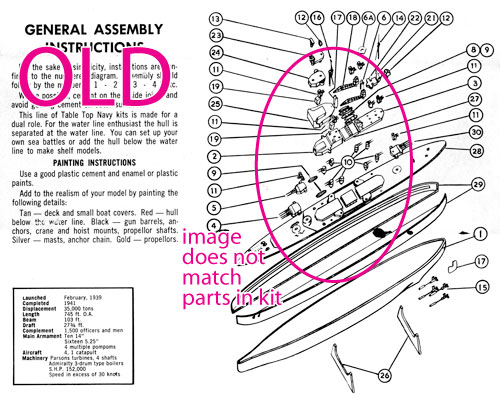
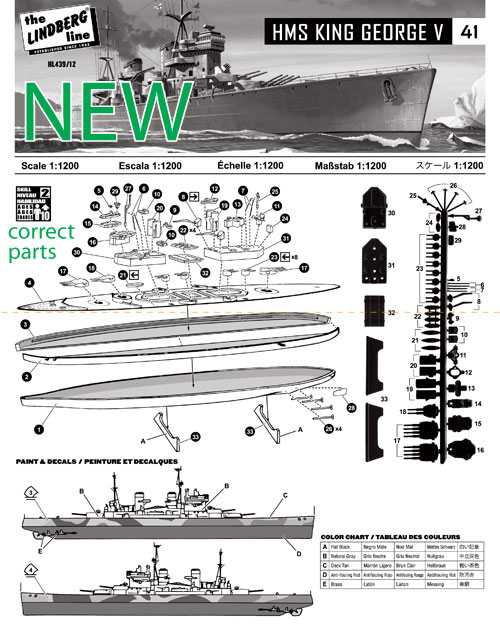
Many of the previous iterations included excessive amounts of text, steps that jumped around the page, and sometimes in sequences that made little sense. See the old and new version of the HL429 USS Hazard Navy Minesweeper. Or in some cases, such as the HL439 Tabletop Navy 2-Pack: HMS King George V & HMS Dorsetshire, the vintage instructions contain errors that have been overlooked for year. The parts in the kit were different than what was pictured in the original instructions. I have found several instances where tools were modified but the instruction sheet stayed the same.
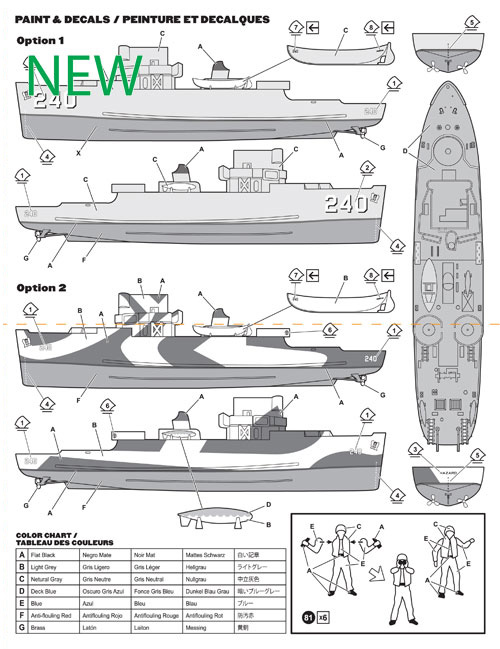
In our new releases you will see instructions with clean line art, steps ordered in a more clear and thoughtful manner, an extended layout allowing for more detailed paint and decal diagrams, and an overall better look. Let us know what you think of the improvements.

