
Posts Tagged ‘models’
The 4-H model – Finishing
Ensure that all paint and glue on your model is perfectly dry. It is good practice to start applying decals the day after you finish assembly and painting. Ensure also that your model is free of contaminants and dust, so nothing may be trapped underneath a decal.
Cut out all the decals you wish to apply with a sharp knife. It is not necessary to cut out the decals perfectly; rather you should leave a few millimeters around each decal to avoid cutting it accidentally.
Fill a bowl or shallow cup with warm water. The water should be at least lukewarm to remove the decals from the paper they are printed on, but not scalding hot. Never use boiling water to apply decals.
Hold the paper the decals are printed on with a pair of tweezers. Make sure you are not gripping a part of the decal itself under the tweezers.
We actually held the paper next to the car and gently slid the graphic onto the car. It is helpful if you get the car wet prior to sliding the graphic to help in positioning it. This will allow you a few seconds to slide the image into the place you want it.
Hold the paper the decal is printed on close to the part you are applying the decal to. The edge of the paper must be lying on the edge of the part, so the decal is transferred immediately from paper to part. Using a clean, wet brush, maneuver the decal onto the part and position it accordingly. Ensure that all air bubbles and creases are removed from the decal by pushing them out with the brush.
Dry the decal by very gently by dabbing it with a clean paper towel. The decal should be left alone for an hour to allow it to dry completely. Until then, it may be accidentally repositioned. To reposition a partially dry decal, simply apply some warm water with the brush and maneuver it back into position.
A few things we have learned…
- Remember that whatever paint-removing solvent you use, it must not harm plastic.
We do have a minor issue under the car where the solvent degraded the plastic a little,but it is underneath…
- Keep all empty sprues when you have finished assembly. They are useful for stirring paint, or making tools that won’t scratch the model you are working on.
These are also helpful for applying glue and you can throw them away when done.
- Keep all unused decals. You may later find them useful for other models.
- Some parts are more easily painted while left on the sprue.This is true particularly of very small parts for the engine. He chose to leave some the original color and chrome but that is an artistic choice.
- A torn decal is not useless. Careful positioning of the damaged portions can restore the decal to a whole appearance.This is where wetting the model can be handy and allow you to slide the decal into position.
- If your paint is too thick to feed through the airbrush, try diluting it with a small amount of rubbing alcohol. The alcohol thins the paint while it is in the airbrush, but evaporates soon after leaving it.
- When applying solvents, paints and glues, do so in a well-ventilated area. Observe all warnings and instructions printed on all your materials and tools.
- Knives and other sharp tools must be handled by experienced and responsible persons only.
- Small parts may pose a choking hazard to small children and animals.
The 4-H Car ….Assembly
- Before gluing parts together, always ensure that the contact points are clean and that the parts fit well. When applying the plastic cement, only apply to one of the parts. An excessive amount of plastic cement will not only prolong or prevent proper adhesion, but may also melt and deform the parts. Plastic cement must always be used as conservatively as possible. When gluing clear parts, such as windows or canopies, try to avoid plastic cement. This is because plastic cement can “fog” clear plastic even in areas where not directly applied. For clear parts, use white glue.
- Gaps between parts may become apparent after assembly. To remove a gap that is too large to overlook, it may become necessary to separate the parts, adjust their fit, and re-adhere. Another option is to fill the gap with modeling putty, or another substance which dries to hardness and can be smoothed and painted over. When applying putty, only the smallest amount is required. An excessive amount will be difficult to remove later and in the case of clear parts, may be impossible to remove without evident damage to the part beneath. Follow the instructions on the packaging and use a plastic tool to apply the putty, so as not to scratch the model.
- If an assembled part is not adhering properly in some places, it may not be necessary to separate the parts and re-adhere. Another option is to use a liquid plastic cement to re-adhere the parts. By applying a small amount of liquid glue to the outside of the gap, the glue is drawn into the gap by capillary action. It is important not to apply too much glue, for the reasons above, but also because too much glue may remain outside the gap and dry to hard, malformed bubbles. In general, less than a drop will suffice. When the glue has been applied, hold the parts firmly together until proper adhesion is assured.
Once two parts are glued together, it may be necessary to clamp them together until the glue sets. This may be done by holding the two parts firmly together with your hands, but you may also use a variety of tools to do the same job. Elastic bands, clothespins, plastic clamps, tape, and wire are all suitable materials. When applying the clamps, make sure that the pressure exerted on the parts is great enough to keep the parts together, but not nearly enough to deform or break them. Also make sure that whatever clamp you choose to use will not scratch the plastic.
Whether you are a competitive modeler (contest, 4-H, Boy Scouts, etc…) or building for fun the following links offer some great tips and tricks to help you.
http://www.ndsu.edu/fileadmin/4h/FamilyConsumerScience/FE101.pdf
http://www.scaleautomag.com/
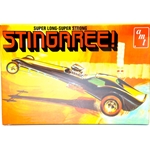
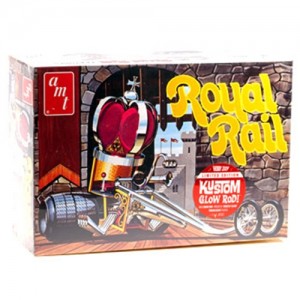
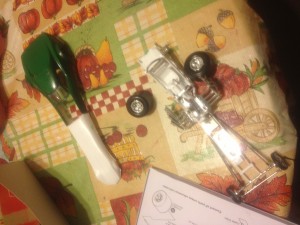
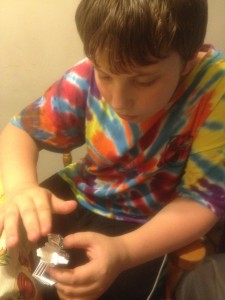
Here we are assembling the engine. He used most of the parts from the Stingaree model, he choose to use use the larger exhaust headers found in the Royal Rail model to customize this model. Here he is trying to hold them in place while they dry.
Building our model for the fair…
Well it is that time of year again and we are just starting our fair projects at home. Unfortunately we live in a 3rd floor apartment, which makes painting both inside and outside difficult. To minimize fumes and mess I began to look for options for building a miniature spray booth. I am not endorsing either of these, because I have not completed it yet, but I found 2 sets of instructions for completing this project.
It looks like the materials I will need to complete this project are
1) Plastic Storage Crate or Similar Size Cardboard Box depending on which set of instructions you choose..mine will depend on whichever box I can find.
2) An extractor fan – the second set of instructions uses the exhaust hood from a stove. This one seems simplest.
3) Flexible hose – like for a dryer vent
- Full instructions are available on the individual pages.
http://www.militarymodelling.com/news/article/homemade-spray-booth/3661/
http://www.interlog.com/~ask/scale/tips/booth.htm
This second set also includes some great ideas for cleaning, painting, and preparing your model. Once we get started I will share our photos.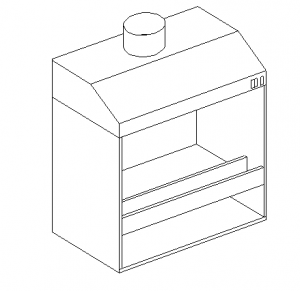
ROUND 2, LLC, ACQUIRES LINDBERG & HAWK MODEL KIT BRANDS
Round 2 to Produce Popular Land, Air, Sea & Space Models – Adding to AMT, MPC & Polar Lights
For Immediate Release
SOUTH BEND, Indiana – 03/18/2013 – Round 2, LLC, is pleased to announce the acquisition of the Lindberg and Hawk Models brands and assets from J. Lloyd International. With the transaction, Round 2 adds these two well-recognized and historic plastic model kit names to their existing trio of AMT, MPC and Polar Lights mode kit lines, licensed from Learning Curve Brands, Inc. in 2008 and purchased outright in 2012.
Consumer trust and excitement has been building over Round 2’s efforts with the initial three brands since 2008. Now, with the assets of five major model companies in its stable, Round 2 solidifies its position as a top producer and fierce competitor in the plastic kit sector of the hobby industry. Thomas Lowe, President and CEO of Round 2 states, “The addition of Lindberg and Hawk results in a combined product catalog for Round 2 that is so diverse, it will include virtually every type of model kit genre imaginable and in a wide range of scales. Whether you’re looking for cars, trucks, aircraft, ships, sci-fi, space exploration, anatomy and figures or even crazy monsters, we now have it all! We’ve made plans to hit the ground running with these brands and are ready to go. As we progress into the future, we will be working with the vintage Hawk and Lindberg tooling to resurrect more exciting kits that haven’t seen the light of day in decades, just like we have with AMT and MPC. We’ll also be happy to put the 1934 Ford Pickup tooling back under the original AMT brand, from where it originated.”
Lowe continues, “Like our customers, we love model building. Lindberg and Hawk models are sure to excite modelers of all ages. From the connection with history to a hunger for an understanding of how various machines, both human and mechanical function, the kits created by the original brands have always offered a wide variety of subject matter for model makers, and we plan on continuing that long standing tradition.
About Round 2
Round 2, LLC is an innovative collectibles company located in South Bend, IN. The team at Round 2 is dedicated to producing detailed, high quality collectible and playable items appealing to the young and young at heart. Round 2 brands include Polar Lights®, AMT® and MPC® model kits, Auto World® slot cars, Forever Fun™ seasonal products and the licensed brands American Muscle®, Ertl Collectibles® and Vintage Fuel™ die cast.
For more details on all the product lines produced by Round 2, visit our website at: www.round2corp.com
AMT, Polar Lights, MPC and Round 2 and design are trademarks of Round 2, LLC. ©2011 Round 2, LLC, South Bend, IN 46628. All rights reserved. ###
-END-
Drag Racing’s Legendary past is a classic story in any scale
In any sport there is period of time you can look at and pinpoint the moment when the sport hit the big time. For drag racing, it was the late 1960s into the mid 1970s. That was when the sport experienced the perfect combination of extraordinary technological breakthroughs, record-breaking speeds, ground-breaking designs and a collection of legendary characters who were always ready to push the limits. It was that intoxicating mixture which took drag racing from a regional sport to one that captured the imagination of the nation.
In the late 1960s, model kit building was an extremely popular hobby. Millions of model kits were manufactured each year to keep up with the demand. Model Products Corporation (MPC), a fledgling model kit company based in Michigan, took notice of America’s attention to drag racing and began to produce 1:25 scale model kits of these cars. Everything from funny cars and rail dragsters to pro stockers and gassers lined store shelves. Names like “Grumpy Jenkins,” “Mr. Norm” and “Dyno Don” adorned the packaging. AMT, Monogram and Revell also produced drag racing models kits, but by the 1980s, model building began to wane and the tooling for most of these models was put into storage.
Today, vintage drag racing subject matter has become extremely popular in model kit and die cast circles. Many famous cars have been produced over the years, but it wasn’t until May of 2012 when Round 2, LLC announced the launch of their “Legends of the Quarter Mile” program that things really heated up. The Legends line was conceived to put a spotlight on the famous names and cars that put drag racing on the national map. Because of the diverse brands and categories under the Round 2 umbrella, “Legends” 1:18 scale die-cast replicas and 1:64 scale slot cars and drag sets are manufactured under the Auto World brand. Vintage model kits are also being reintroduced in 1:25 scale under the MPC and AMT brands.
The release of Harry Schmidt’s Blue Max Mustang Funny Car as a 1:18 scale replica signaled the beginning of a wildly successful program that has captured accolades from racing fans and hobbyists alike. Several original teams and drivers have contacted Round 2, asking to have their cars immortalized in this exciting series!
It was well before the first release, when work began to reintroduce several of the most popular drag racing model kits ever made under the “Legends” line. Some had been unavailable for decades and had been commanding big money on the collector market. The original tooling had to be scrutinized and in many cases, parts recreated. The artwork used to produce the decals in the original kits was long gone. Archival photos and other reference material was used to freshly replicate all the logos, badging and other markings in creating new, more detailed and accurate decal sheets. It was a challenge to find several of the original drivers. Some had moved on to other businesses and others had unfortunately passed away.
Late in 2012, Round 2’s MPC brand reissued Arnie Beswick’s “The Super Judge” GTO and Connie Kalitta’s Bounty Hunter Funny Car model kits in the Legends of the Quarter Mile program. These deluxe 1:25 kits are available for the first time in decades and have additional extras added, like the additional window parts in the Beswick GTO molded in clear orange, replicating the real car’s tinted backlight. You’ll notice the attention to detail with the kits’ extremely popular pad-printed tire lettering and a connection to the past with the vintage box artwork.
The latest Legends model kits include a special edition of AMT’s Ohio George Montgomery 1933 Willys Gasser and Carl Casper’s famed Young American front engine rail dragster, complete with bonus items and packaging that will delight any modeler or kit collector. For the Young American, Round 2 worked with Carl Casper himself to acquire a fantastic photo of the 1:1 car doing a wild pre-run burnout, to use on the packaging. It was a photo taken only seconds after the original one was used on the original release of the kit back in the 1970s. MPC’s team turned another photo Carl provided into a bonus card to include in the kit, featuring the specs of the car and a list of famous wins.
For the latest Legends of the Quarter Mile news, updates and offers, check out www.autoworldhobby.com/Legends. Get Legends of the Quarter Mile products at hobby stores, racing and die-cast related stores and www.autoworldstore.com.
Let the Kat out of the box!
What could be better in the winter months than enjoying time at your modeling workbench, jammin’ on your latest and greatest build? Finding a Katch the Kat version of AMT’s upcoming “Sock It To Me” 1962 Chevrolet Corvette kit, that’s what! The Kats are at it again, getting ready to reissue a perennial favorite kit, in the most desirable format ever seen in its history: SOCK IT TO ME! Back in the day, the original AMT Kats cleverly created issues of select kits named after popular catch phrases of the time. The “Sock It To Me” ’62 ‘Vette oozed additional coolness, with it’s psychedelic “airbrushed and pinstriped” box artwork and fluorescent orange lettering.
The FOUR different mod car illustrations on the box made you want to build one, or more, “real bad!” As a special bonus, inside the kit was a bonus Sock It To Me bonus sticker, printed with day-glo ink. The model could be built as a sporty stock replica, but also included a myriad of performance parts to create several different inspiring custom and racing variants: a blown quarter miler, a DOUBLE-blown salt flats rocket, or a totally mod custom with mind-blowing pinstripe and flame decals! Dig? Dig!! When the Kats decided to reissue the kit in the SITM packaging, they went all out, making sure it was just as sweet as the original… even better! They’ve included pad-printed “pie crust” M&H Racemaster slicks along with “wide whitewall” Firestone Deluxe Champion tires. They even restored the vintage slotted Astro mags back to their original appearance by adding back the textured center sections, for the ultimate in retro realism. The super-colorful decal sheet has been completely recreated from scratch, and we think you’ll agree, they are beautifully brighter than the originals! The Kats like the feature-packed ’62 Vette kit so much, they’ve decided to include it in the exclusive “Katch the Kat” program. Just like the Meyers Manx and Grandpa Munsters’ Drag-U-La, one in every twelve Sock It To Me ’62 Vette kits is molded in a special metallic color. Every metallic kit includes a confirmation card inside the box to let you know you’ve found something special! This time, and in keeping with the groovy box art, the metallic color is far-out orange! But every kit, whether it’s molded in white or metallic orange, includes a reproduction bonus “Sock It To Me” sticker, just like the original. It’s fabulous fun – only from the Kats at AMT!
Round 2 Model Kits: And away we go…!
A month has gone by since Wonderfest and this is the first sliver of time that I’ve been able to quickly jot down some vital info to recap. (as usual, things are super busy in my wing of Round 2 Models) I know everyone has been waiting to hear the details of some of our announcements. Right now, I’m going to give a quick rundown. I’ll be able to go into more detail later on as the kits progress. So without further delay away we go…
New kits-
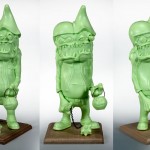
Dirty Donny’s Two Much – As announced in our last enewsletter, we will be producing a kit based on this Kar Kulture artist’s character design. He’s a crazy-kewl creature that will include several decal options to decorate him with.
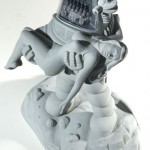
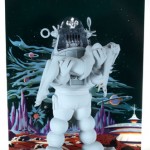
Forbidden Planet Robby the Robot Movie Poster Edition- This kit will recreate the classic poster. It will consist of several parts from the existing kit, but with new legs, Altaira (as depicted in the poster) and base with cardboard standup.
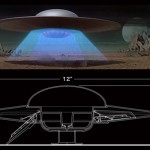
Forbidden Planet C-57D 1:144 scale- We are happy to offer the classic flying saucer in a size that will fit on your bookshelf. The model is based on all new research and will not be based on our 1:72 scale kit. It will feature parts for a landed or flying pose including opening and closing landing ramps.
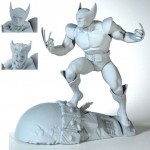
Marvel Comics Wolverine- The fan favorite character gets the treatment he deserves in a plastic model kit. He will be offered in his yellow costume as depicted in the early days of the character. He comes with two head options, masked and unmasked.
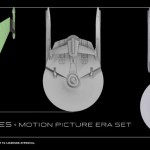
Star Trek TMP Cadet Series 3 ship set featuring new tools of the U.S.S. Enterprise Refit, U.S.S. Reliant & Klingon K’tinga as 1:2500 scale snap kits. The Refit and Reliant will come with the surface decals just like previous Cadet kits. The hope is to release at least one kit or themed set like this one each year to expand on the Cadet Series.
New licenses-
Elvis- Yes, he seems to have returned to the building. We are exploring an HO scale Graceland and possibly figural kits. We will see what the future holds for the king.
Wizard of Oz- The first kit we will look at doing is the Wicked Witch of the West in 1:8 scale. Depending on the reaction to this kit, we will take a look at doing the rest of the cast of characters from the iconic film.
DC Comics- Our approach to the Wolverine kit should give some indication into how we plan on creating new figural kits of some of the most widely recognized characters in the world. They will be well posed and detailed, but with a hint of nostalgia mixed in. Our initial ideas are for Superman and Batman kits inspired by some classic comic scenes and artists.
Iron Giant- Though this isn’t technically a new license for us, it was the first we had announced the possibility that we could do a kit form the animated film.
What comes next?
Our biggest announcement is that we are reaching out to the modeling community to decide one of our 2013 kit releases. The audience in attendance at our presentation took an active role to determine who the candidates will be. Everyone is eligible to cast their vote. Go to https://www.surveymonkey.com/s/6HFNN6Zto answer a few questions for us and vote for one of the following kits
1:1000 scale U.S.S. Reliant
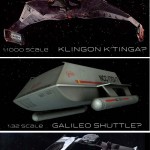
1:1000 scale Klingon K’tinga
1:32 scale TOS Galileo shuttle
1:2500 scale U.S.S. Akira
I2” tall Iron Giant
We are putting the finishing touches on our youtube video of our presentation. We have a lot more in the mix this year so please be patient as we get it all tidied up. We hope to have it ready in the next couple weeks. I’ll let you know as soon as it is finished.
Round 2 Model Kits: DO… YOU… WANT… TO…PLAY… A… GAME…?
This may not turn into “Global Thermal Nuclear War” (well at least I hope it doesn’t), but I always like to post about things I’m kind of jazzed about when I’m working on Round 2 model kits. Usually when there is a lull in posts, it is because I’m busy working on a package or instruction sheet. Both are major time hogs but generally aren’t much to talk about. So when inspiration hits, I always try to write something out real quick.
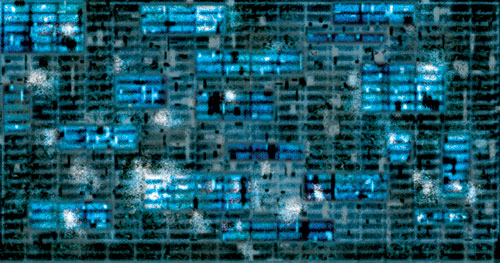
Anyways, I’ve been working on some decals this week that have been pretty fun. Rather than come right out with it, I figured I’d make a game out of it. (Michael, our new creative director LOVES games. I hope he is proud of me.) So, the pic shows what I’ve been up to. I’ll give you twenty guesses as to what it is. Whoever correctly guesses first is the winner. I’ll send the winner a proof of the decal sheet when it arrives.
UPDATE: OUR WINNER… CHIANGKAISHECKY
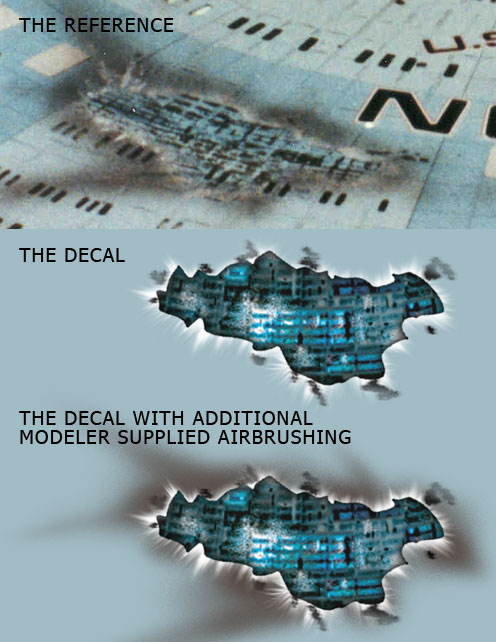
I knew it wouldn’t take long but I figured I would have to drop at least one hint. We are bringing the U.S.S. Enterprise NCC-1701-C back out by the end of the year and it will feature a nice size decal sheet featuring ALL NEW battle damage decals based on the original filming model. When I first started figuring out how much I would be able to include, I discovered that the ship was pockmarked with relatively small spots of damage. Once I had a map established, I discovered that if I concentrated on the hull opening itself but not include the black burn marks, I would be able to include every spot I could detect in the reference I had on hand. I figured most modelers could handle the little bit of freehand airbrushing that would be needed to complete the look. Even without the additional airbrushing, they look pretty good on their own. I’m showing one of the decals below along with the reference shot and how it will look with a little airbrushing.
Besides revised Enterprise-C registry markings, U.S.S. Yamaguchi registries will also be included. Unfortunately, it doesn’t look like I will have room on the sheet for the U.S.S. Excalibur registries. The sheet size is determined by the bottom of the box and it looks like it will be pretty well packed. We will have a product page up our website soon.
Round 2 Models: Get ‘em While They Are Hot!
Sorry for the long gap between posts but it has been a busy month here at Round 2 Models. We have been super busy wrapping up our new model kit catalog and our national sales meeting. With all that behind us, it is back to work.
One thing dawned on me while working on the catalog… Well, two things actually.
1) The Bigfoot and Strange Change Mummy and Vampire are in production as I type and they are being manufactured here in the US. With a couple hiccups overcome, I hope to see pre-production samples soon. We hope to have the kits released by the end of October. That leads me to…
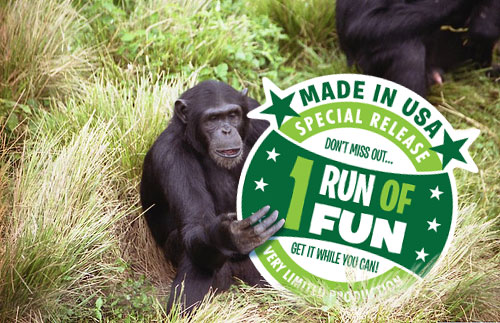
2) We are starting a new initiative that we are calling “1 RUN OF FUN”. Basically, what we have found is that there are certain kits in our tooling banks that we get requests for that are too cool not to bring back out, but they won’t necessarily appeal to everyone. So we will be running the kits once and that is it! In the case of popular kits, we might do several runs as our inventory gets low and sales on a kit continue steadily. We have seen some cases where we soon find out that after the first batch, they will never be run a second time. With history on our side, we can predict which kits will likely fall into this category. In a few cases, there are kits that we might run because we want to backdate the tooling to an earlier version so we’ll first run it one last time in its current condition for anyone looking for a later version. Then, we’ll rework the tooling to its original condition with no hope of changing it again. So, from now on whenever you see a 1 RUN OF FUN sticker on one of our kits that means “get ‘em while they are hot” or you might miss out. The Strange Change Mummy and Vampire and Bigfoot are our first kits released under this program.

