Recommended Sites


Archive for the ‘Round2 Models’ Category
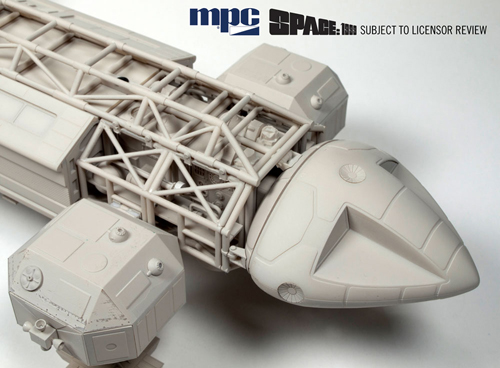
MPC Model kits: 22” Space:1999 Eagle update #5
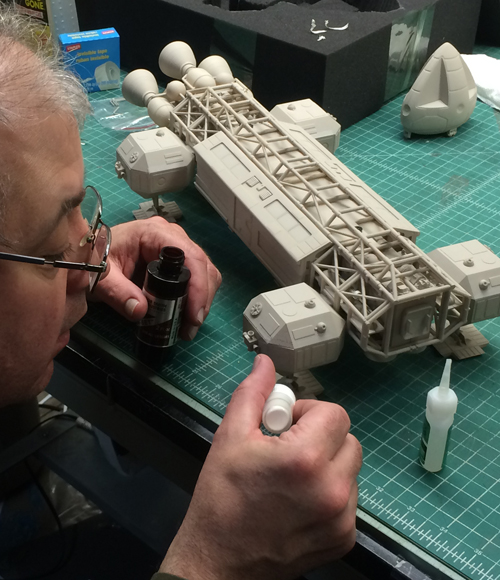
Hi there Eagle fans. One last blog post to wrap up my series on the new MPC 22” Space:1999 Eagle kit. I might follow up later on with some process stuff about the box design and illustration, but I expect my next blog will be about the new parts for the U.S.S. Excelsior. But first, what more could be said about the Eagle…? Heh. Wait for it…
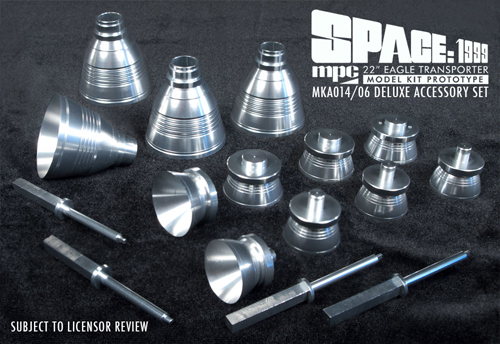
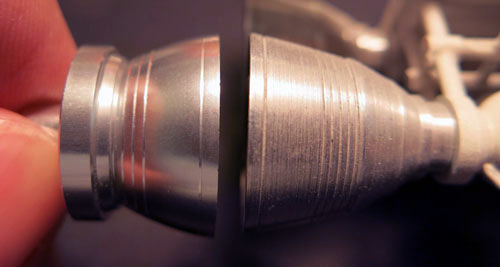
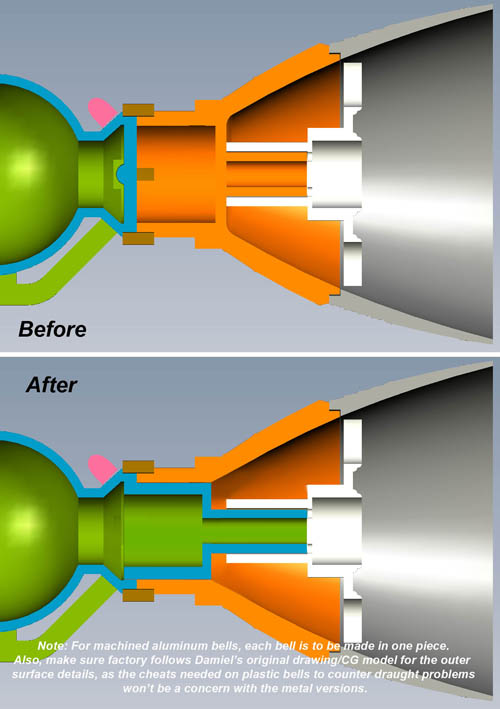
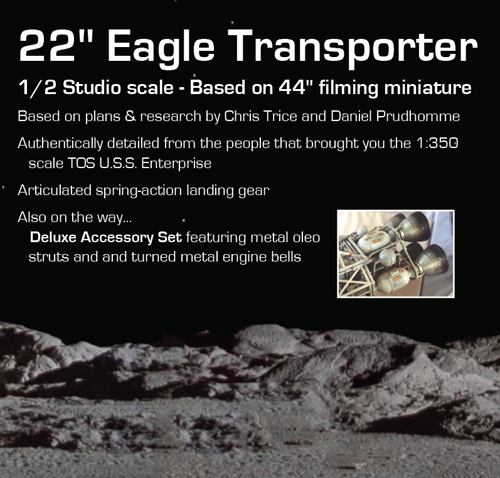
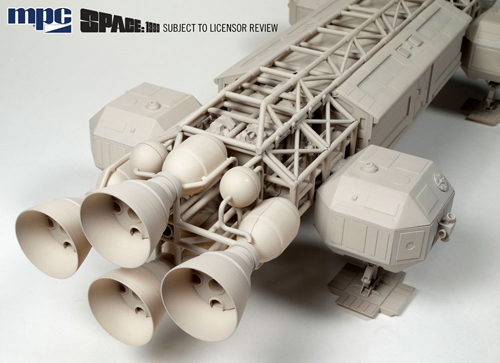
We announced at Wonderfest that we will be releasing a set of metal bells and oleo struts. Well, here is a peek at the first set of samples. They look great if I do say so myself. We need a small amount of adjustment on one of them, but otherwise looking good. The set of 12 aluminum bells and four oleo struts will retail for around $100.
Click to view the following image at full size.
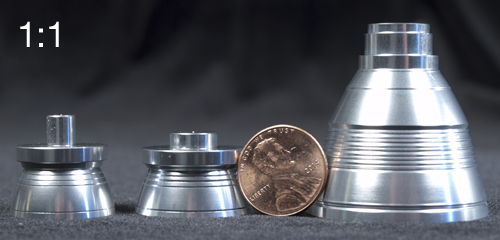
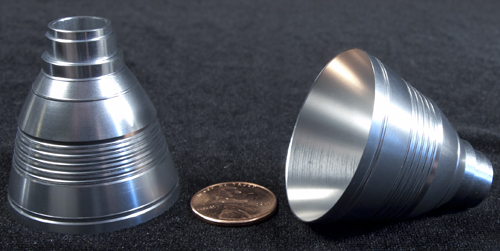
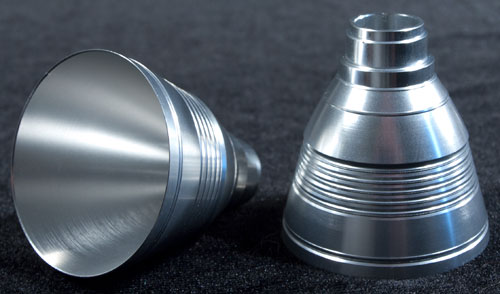
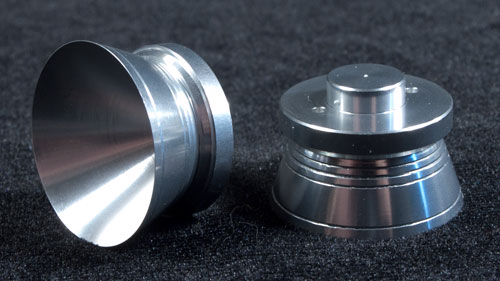
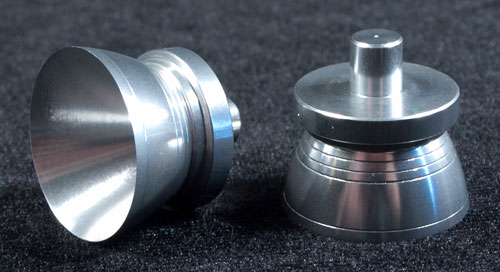
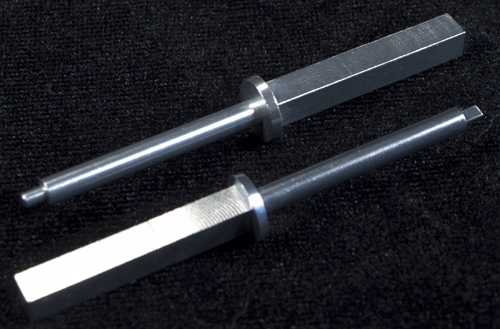
This shows the comparison of one of the VTOLs to an aftermarket main engine bell installed on a 1:96 scale Product Enterprise Eagle.
We recently decided to offer another smaller metal accessory for the kit, which will include the small shoulder pod RCS thrusters. These should retail for about $25-30. I’ll let you know when we get samples in.
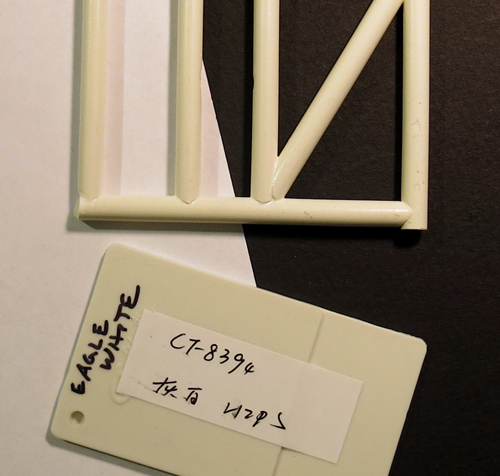
Next, if you hadn’t heard we have on occasion had faulty decals found in our kits. In an effort to improve that situation we will be starting a relationship with the world-famous decal manufacturer, Cartograf out of Italy, and the Eagle kit will be one of the first to take advantage of their superior quality. Other kits will start using Cartograf decals as well with a couple trickling out towards the end of this year in our Lindberg products and more being used in our other brands early next year. Once we get some kits rolling out with them, we will evaluate whether to start using them across the board. Cartograf is THE name in water-slide decals having supplied decals for several other well-known model kit manufacturers. I recently tried a “side-by-side taste test” myself. I found that they “feel” thicker even though they are not, and they do not fall apart in water or tear nearly as easily. They seem to really suck themselves down to the surface of the model conforming superbly to compound surfaces. All kits that use them will have a sticker on the outside of the wrapping to clearly show that they are included. It is our genuine hope that this demonstrates how important it is for us to make sure our product is as high a quality as possible.

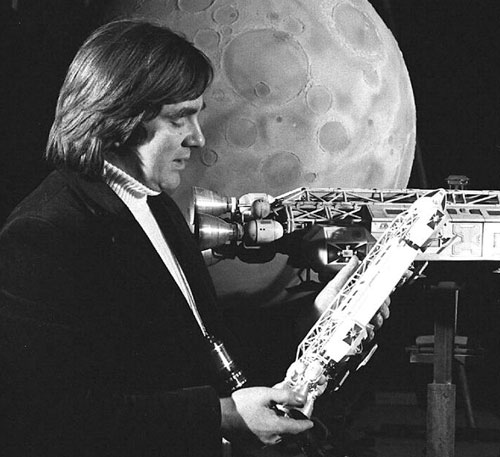
Last and hopefully not least, I think we have a bit of news that will literally put the kit over the moon. (okay, maybe not literally) We will have the ship’s designer and Academy Award Winner, Brian Johnson, review the kit himself in hopes of getting his endorsement to apply to the packaging.
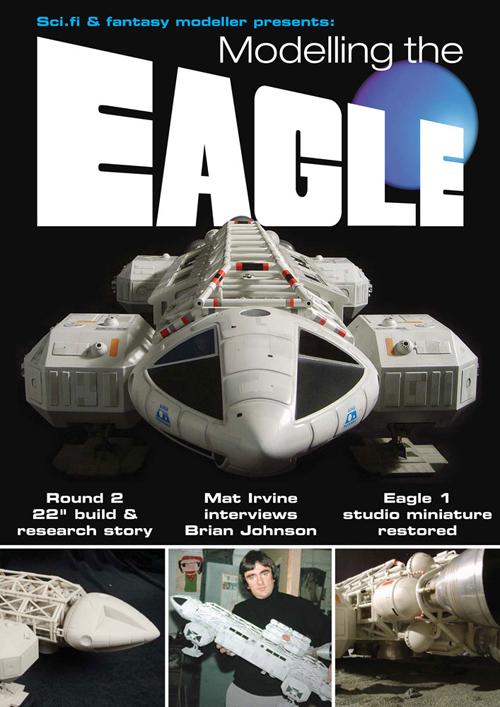
Along with that I am thrilled to share even more excitement… Happy Medium Press, publishers of Sci-fi & Fantasy Modeller, are putting the final touches to the contents line-up for their Modelling The Eagle Special, due for publication early in 2016. They have given us an exclusive look at the cover, prior to them announcing the title on their site in the next couple of weeks. I’ve seen the list of potential article features and a great portion of it will cover more about our new 22” Eagle kit.
Well, what do you think…?
MPC Model kits: 22” Space:1999 Eagle update #4
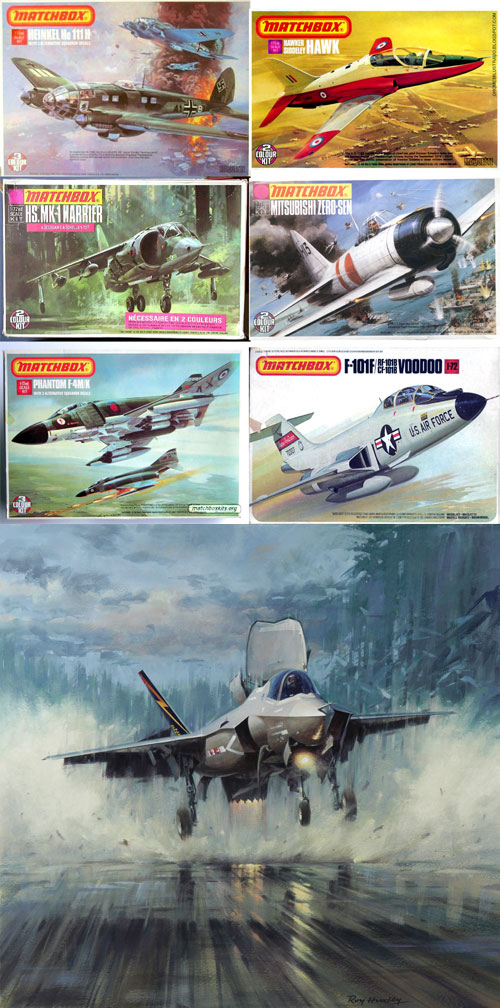
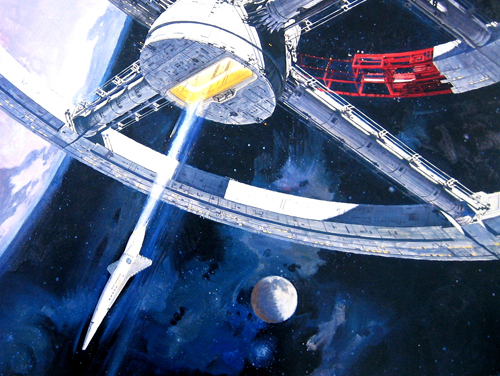
With the development of the new 22” Eagle model kit currently in the tooling stage I have started design work on the packaging. I’ll be illustrating the box lid personally on my own time. Jim Small pointed out the stunning illustrations done for the Matchbox line of kits by Roy Huxley. I’m taking them into account as well as Robert McCall’s work and focusing on his 2001: A Space Odyssey poster. Their art is very inspirational. I can only hope that my skills can pay them due homage.
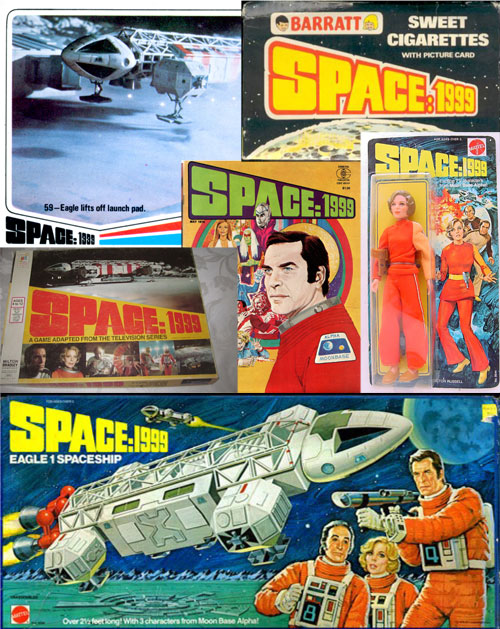
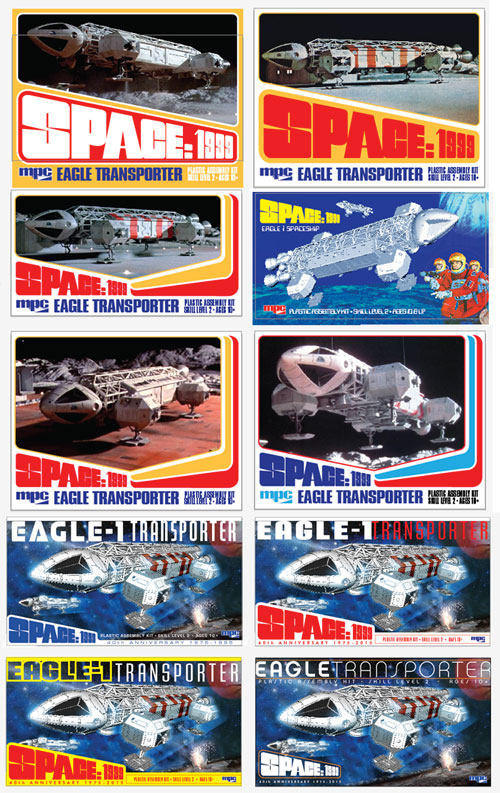
While digging into my illustration inspiration, I’ve been playing around with fonts and design motif’s that span the range from throwbacks to vintage Space:1999 products and collectibles like the old Eagle toy to contemporary takes that still keep a toe in the 70’s. Despite wanting to capture the look of the vintage products, I’m at a slight disadvantage because nearly every product uses the main three characters in a significant way. I can “cheat” by plugging in some of the other characters or putting everyone in helmets. Surprisingly after examining the size of the sprue frames and estimating a box size to hold them all it looks like we may have landed at the fortuitous box width of 22” wide.
These are quick study layouts using screencaps of the Eagle just for positioning while exploring the rest of the layout and various motifs.
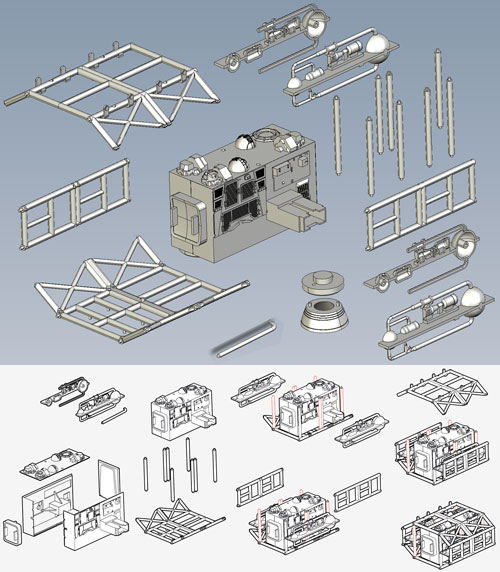
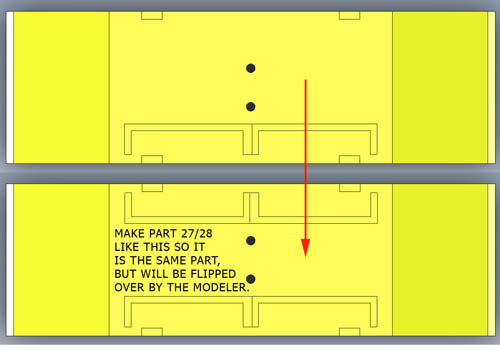
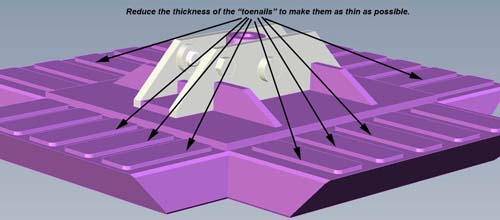
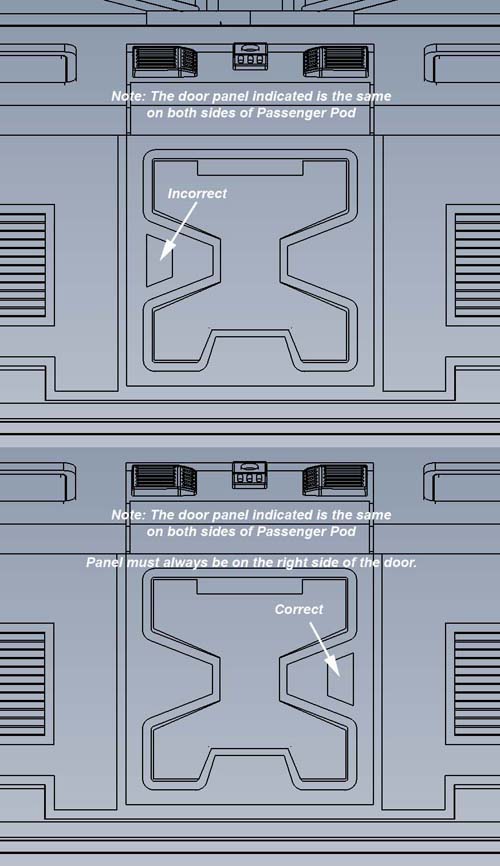
I’ve contracted a skilled digital artist named Ken Netzel to help with instruction sheet diagrams. I’ve been playing around with how to best lay out the instructions. Though not what I would consider a knock-off by any stretch. I’m taking another cue from Matchbox instruction sheets, which had a very clean, nicely gridded look to them.
MPC Model kits: 22” Space:1999 Eagle update #3
At this point we are about half way through our series on the new MPC Space:1999 Eagle transporter. So far we’ve covered some of the kit features and the prototyping process.
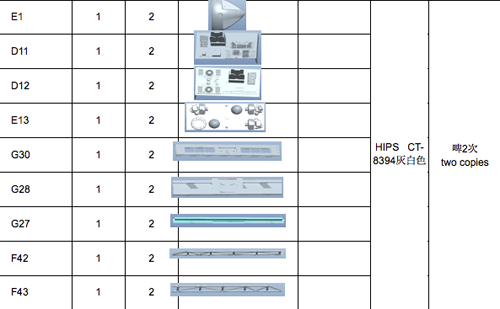
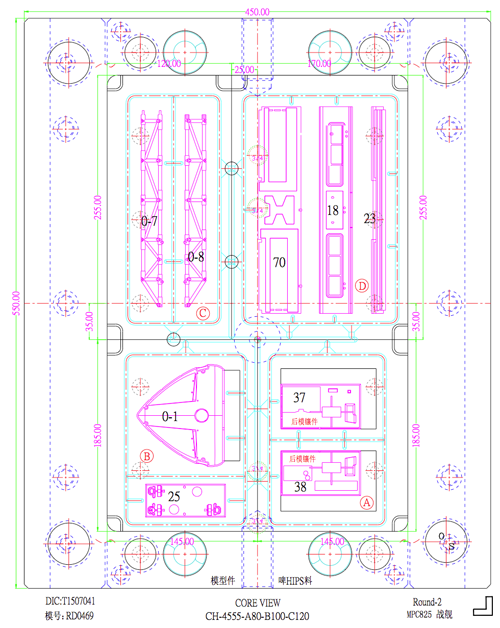
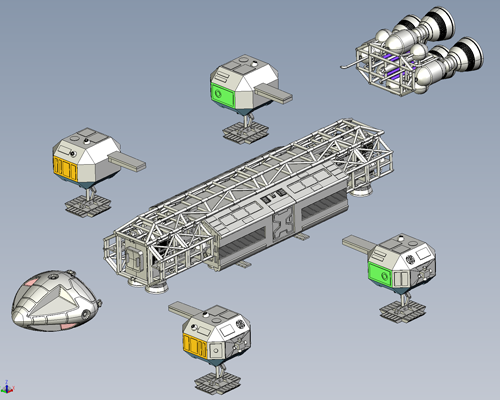
Since approving the digital mockup, I’ve been presented with a tool plan and layouts, which have since been reviewed and approved. The tool plan is basically a listing of every part in the kit. It shows which tool they will land on, how many copies of the part are on the tool and how many times a given tool will need to be injected. At last count, we were in the neighborhood of 320 total parts in the kit! With all that done and all parts accounted for, the tooling process has begun. I expect to see test shots in early September!

Next, a look behind the curtain at packaging and instructions…
MPC Model kits: 22” Space:1999 Eagle update #2
UPDATED WITH MORE IMAGES!
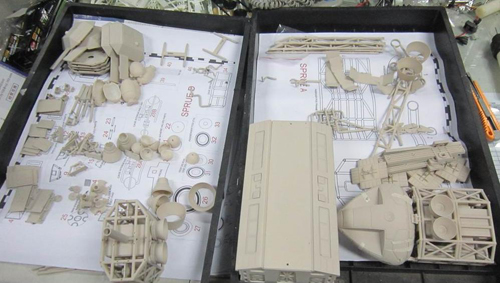
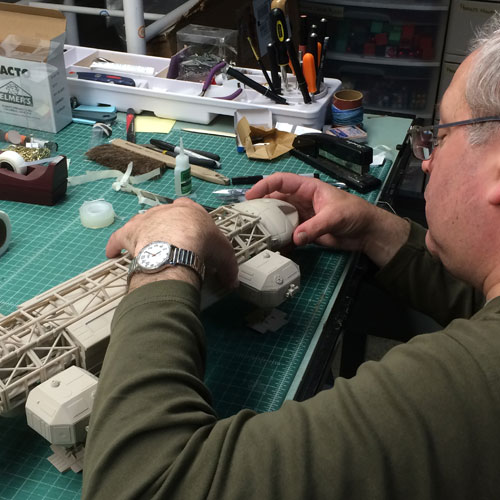
Continuing the look at our upcoming 22” Space:1999 Eagle from MPC… You may recall that we received the kit mockup just days before Wondefest. I was swamped with show prep, so it stayed in the box it came in until Jim Small did his repairs to it the day before we left.
After displaying the prototype at the show, we found very few substantive errors when we gave it our thorough review. In a case of the 1:350 TOS Enterprise kit we probably had between 50 and 100 points to change between the first prototype and the end product. For this kit, we found about 10 things that needed to be corrected and a handful of other things had to be addressed like the cockpit wall and areas where tool drafting hadn’t been fully resolved.
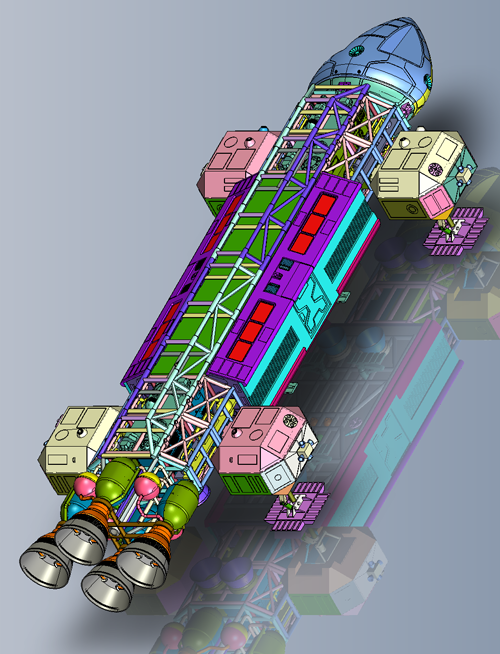
For the most part, what you saw in the Wonderfest mockup is what the end kit will be. I give all credit for that to my development partners Jim Small, Daniel Prud’homme and Chris Trice. Their research, data and their mindfulness of how the kit should be parted out, etc. really made a huge difference that took months off the development timeline. The differences were actually so minor that I didn’t require the factory to implement the changes to the mockup and instead reviewed them digitally only. Photos of the mockup were submitted to the licensor and it has been approved!
MPC Model kits: 22” Space:1999 Eagle update #1
A month has blown by and I couldn’t let another week go by without posting. I figured the hot topic may still be the new Space:1999 Eagle kit we announced at Wonderfest. Like I did back in June, I’ve written several posts that will appear weekly. We have closed the thread for the survey. Thanks for all of the input. We’ll be tabulating everything and I’m sure I’ll post some kind of response to the tallies later on. And now, on to the Eagle…
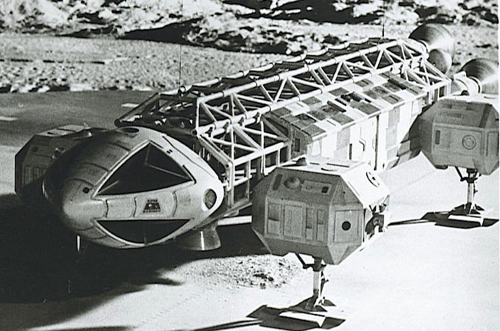
The kit is based on the ship as it appeared early in season 1. The model was redressed and details changed as filming went along. In some a few minor instances details have been simplified or compromised from how the miniature looked. The sub-assemblies of the kit will go together in much the same way as the original did.
The kit will measure 21 5/8” long, which is exactly half the length of the 44” (it wasn’t quite that long) filming miniature that was used during filming of the show. The “true” length of the ship has always been a point of contention. Like the Galileo shuttle in Star Trek, it has the Tardis-effect of being bigger on the inside than it is on the outside. Most glaring is the fact that the doors on the personnel pod aren’t to scale with the doors martin Landau stepped through. The case can be made that the ship was longer. We landed on this length for two reasons. 1) 1/24 scale modeling materials were used to create both this miniature as well as the surrounding environments such as the MBA interior shots of the Eagle hangar. So, if you want to scratch build the environment to match the show, going exactly ½ scale from that is ideal. 2) From the development budget standpoint, the kit parts would have outgrown the amount of tooling we had estimated. Even just a couple inches longer threw everything off and driven up the price of the tooling to the point we could not have managed it. In the end, we figured the market would accept a kit in the area of 2’ long that was properly detailed even if the scale stated on the box was to be ignored. In order to sidestep the debate, I generally refer to it as the 22” Eagle and only state the scale for the benefit of the parties that require us to assign a scale.

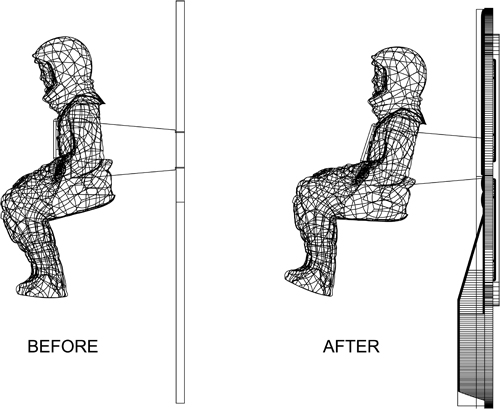
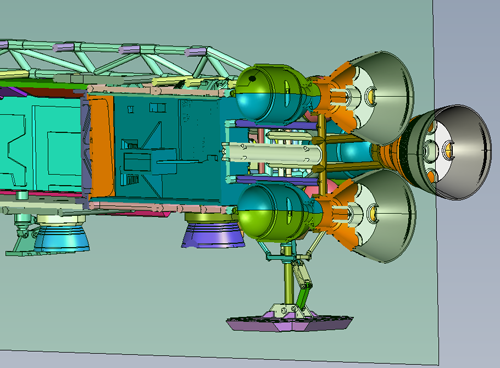
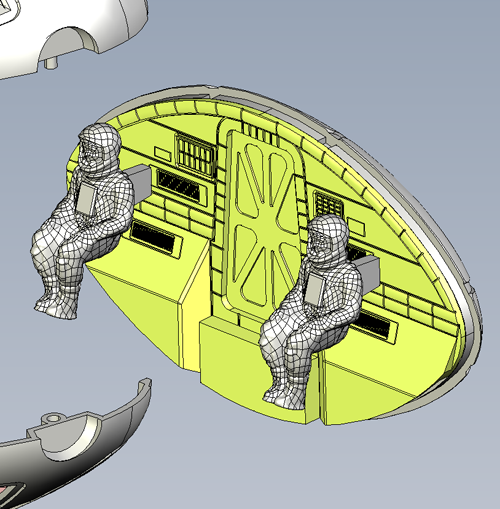
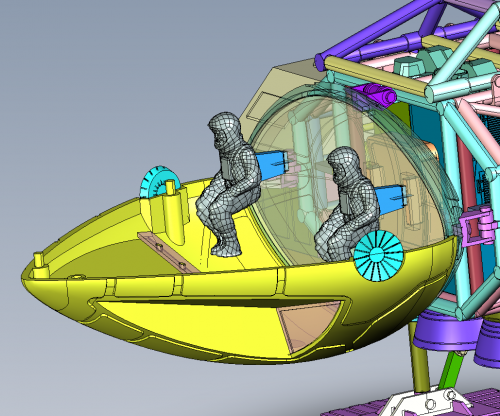
The kit will come injected in two colors, white and gray along with clear windows. The white plastic is a match to the paint used on the miniature. The kit will feature spring-action landing gear with articulated elbow joints. At the show we gave a look at the interior of the command module with it being a flat wall with figures mounted to it in much the same way as the original had. We have since found the opportunity to improve on this though and now that flat wall will feature relief detail that matches the interior set pretty well. A dash and console would barely be visible so those aren’t included. Again anyone that wants to add interior features like that as a scratch-building exercise will find the room to do that. Some have remarked that they thought the use of a screw to hold the pod in place will be a bit of an eyesore even though the original looked that way. For the sake of the stability of the model, we do have other attachment points designed in that would hold the pod in place without the screw. For the purists that want a completely removable/swappable pod these attachment points have been designed for easy removal.
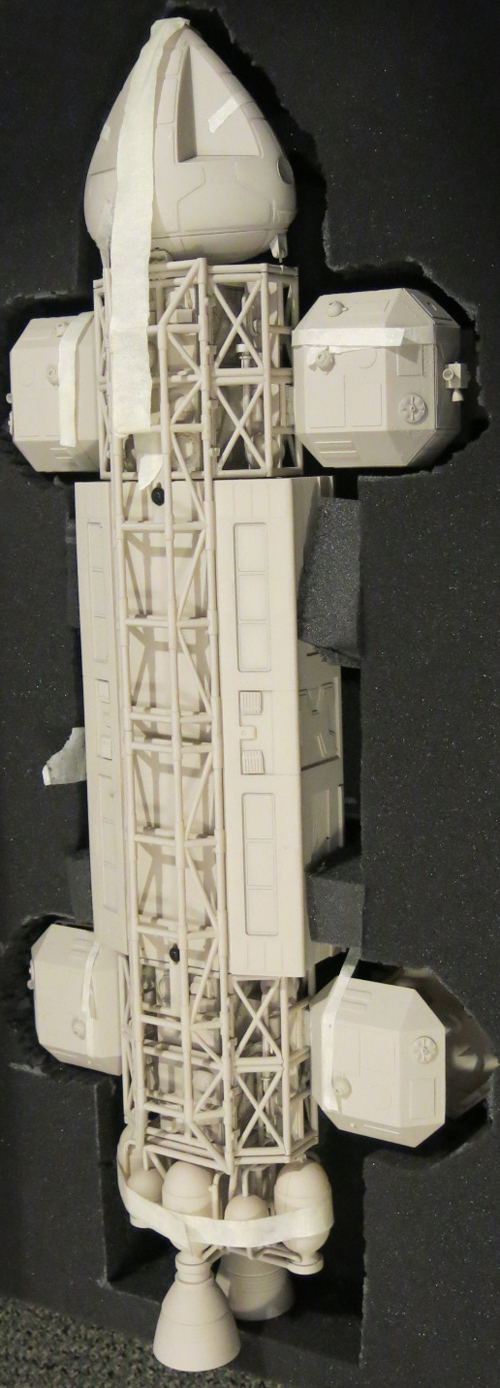
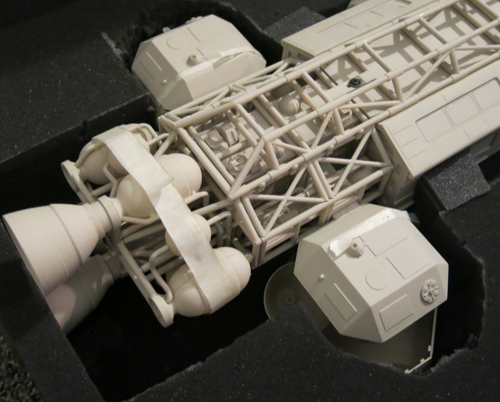
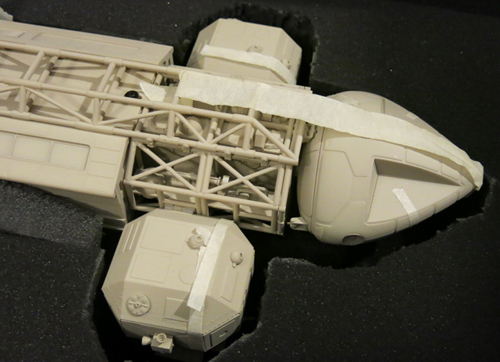
Enjoy a few peeks inside the model. Next time I’ll talk more about the mockup.

Round 2 Models: Wonderfest 2015 survey
Though we skipped it last year, we brought back a short survey this year asking about kit ideas and a few other matters. A lot of folks that can’t miss the show always want to know what we were asking about and have their opinions heard. So I figured I’d use the blog to ask the public at large. Feel free to leave your answers in the comments.
Here is how it will work. The Questions are numbered. Write the number and your chosen answer. If only one answer is asked for, that’s all we want. If you leave more than one, neither answer will be counted. “Tough choices” you may say… Well, that’s why I’m asking. I see merit in all of them, and they are grouped very specifically. Does the fact that we are asking mean that we intend to do any or all of these kits. Not necessarily, but we wouldn’t ask if we didn’t want and answer. Don’t be surprised if an unpopular answer becomes a kit before more popular ones do. We have many factors that will ultimately influence our decisions.
Note that comments to not immediately appear. They have to be approved first. So don’t worry if you don’t see your votes added immediately at the bottom of the thread. We’ll let this run through the end of July. So don’t wait. remember if your votes aren’t in the form of a response to this post they won’t count toward this survey.

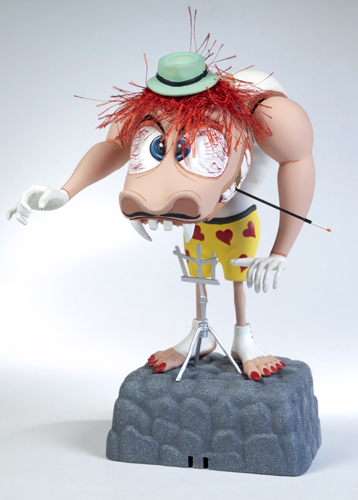
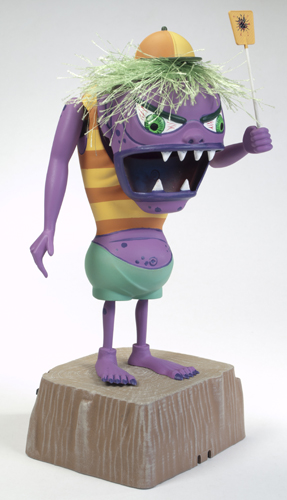
1) See the goofy looking figure holding a flyswatter? What should we name him?
2) Would you support a Round 2 Models Kickstarter campaign for any of the following kits? (select all you would be interested in)
A) Not familiar with Kickstarter
B) Sealab III
C) 1/25 scale Green Hornet Black Beauty
D) 1/350 scale Klingon K’t’inga
A) I wouldn’t support a Kickstarter campaign
3) What length is the K’t’inga (choose one)
A) 214m
B) 349m
4) Choose your favorite from the below Star Trek kit ideas (choose one)
A) 1:1000 U.S.S. Constellation
B) 1:1000 FJ scout/destroyer
C) 1:2500 Nebula-class (Enterprise 1701-D variant)
D) 1:2500 Enterprise 1701-D Dreadnought
E) 1:1000 Battle Damaged Refit scale w/ dry dock
5) Choose your favorite from the below Star Trek kit ideas (choose one)
A) 1:1000 Klingon K’tinga
B) 1:1000 USS Defiant
C) 1:1000 USS Voyager
D) 1:1000 USS Grissom/ KBoP scale 2-pack
6) Choose your favorite from the below Star Trek kit ideas (choose one)
A) 1:2500 USS Akira
B) 1:2500 Excelsior/Ent-B, Oberth, KBoP 3-pack
C) 1:2500 NX-01, Voyager, U.S.S. Constellation 3-pack
7) Choose your favorite from the below Star Trek kit ideas (choose one)
A) 1:1000 Enterprise 1701-D
B) 1:350 Ktinga
C) 1:350 Klingon D7
8) Choose one of the below Space:1999 kit ideas (choose one)
A) 1:48 Hawk
B) Ultra Probe
C) Laser Tank #1
9) Choose one of the below Space:1999 kit ideas (choose one)
A) 22″ Eagle Transporter W/ LAB POD
B) 22″ Eagle Transporter W/ CARGO POD
C) 22″ Eagle expansion set #1 – Nuke Mine, Claw, Side Booster & Laser Turret
D) 22″ Eagle expansion set #2 – Gantry, Entry Stairs, Buggy, Nuke Pods & Figures
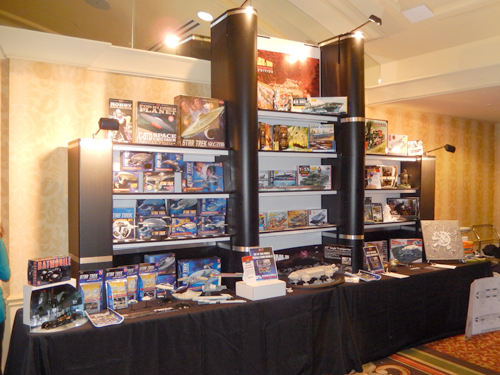
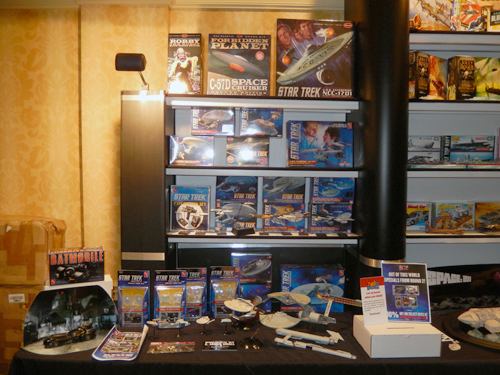
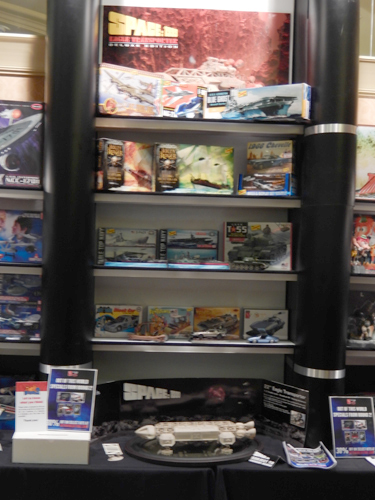
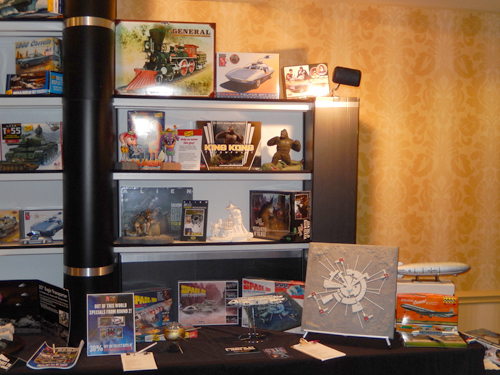
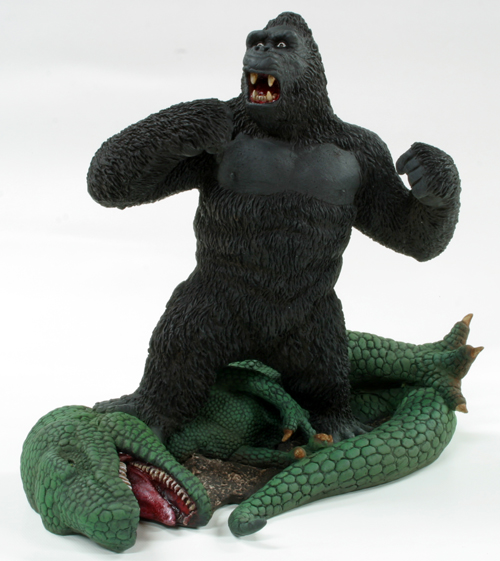
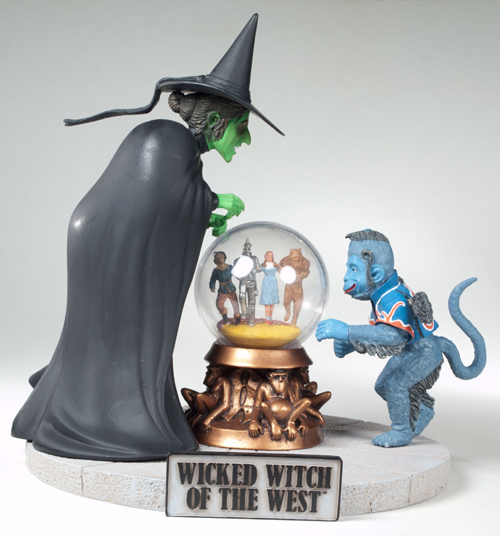
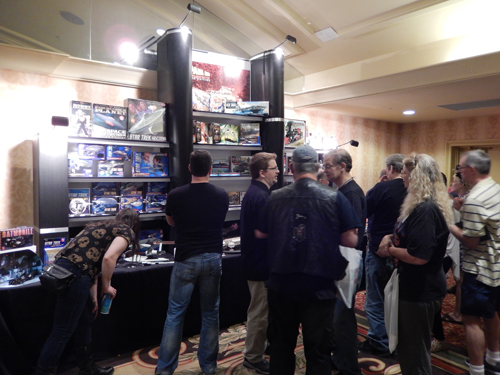
Round 2 Models: Wonderfest 2015 Highlights
So what else did we show besides the Eagle? How about the fact that we have “un-cancelled” the King Kong kit we showed a couple years ago? Circumstances changed and we were able to bring the kit out after all. Along with that, we also showed our Wicked Witch of the West kit that will be released in resin, but will have a few plastic parts. Both models got great reactions from the figure-modeling crowd.
Another pair of kits we showed will be coming in 2016 from our Lindberg brand. Some may or may not remember one of them, The Mad Maestro. He was a whacky kit that had one release back in 1965. He was a motorized figure kit. The effect was that of a vibrating bobble head. Unfortunately, we couldn’t get his motorized action to work under the deadline of the show. We’ll see what needs to be done to fine tune that aspect of him.
One of the most mysterious things we’ve uncovered in any of our tooling vaults is another motorized figure that uses the same kind of works as the Mad Maestro. The thing is, we can find no trace of the kit having ever been released. We don’t see it in old catalogs. We don’t know what it was called, so it is kind of difficult to research. We are actually asking anyone with any kind of information on him to let us know. In the meantime, we’re trying to figure out what to call him.
We have plenty more in the works than what we showed, but I’ve adopted a “don’t talk about anything before we have a mockup or test shot to show for it” policy. Hopefully, this will avoid the pain and anguish that we all feel when a kit doesn’t make it to production as previously announced. I will say that one kit we hope to get done by the end of the year is a Star Trek kit that we get quite a few requests for.
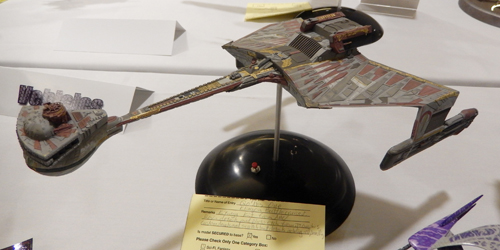
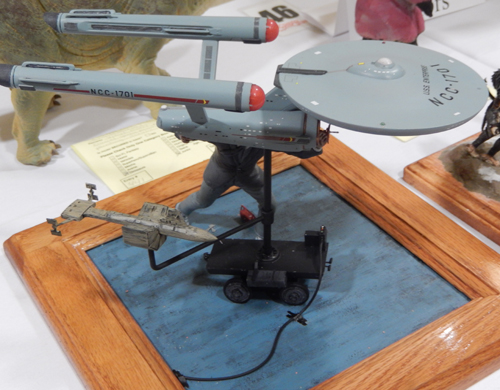
As in the past couple years, we sponsored an award in the model contest for the best use of a Round 2 model. We give two awards, one for and adult and one for a junior/teen. Take a look at our facebook gallery to see all of the models we found that used one of our kits (that we could figure out anyway…). This year’s winner for the adult category went to David Windham for his “Qo’Nos Oue Klingon Battle Cruiser”. The Junior/teen winner went to Alex Tabor for his diorama entitled “These are the Voyages” which featured a look at the behind the scenes filming of the 11’ studio model for Star Trek: The Original Series.
If you want more info on anything shown in the booth pics, just leave a comment and I’ll give more details.
Round 2 Models: More from Wonderfest 2015
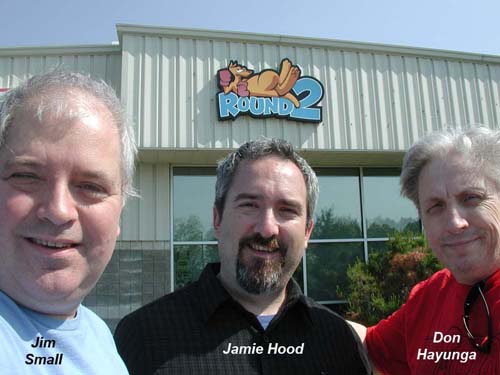
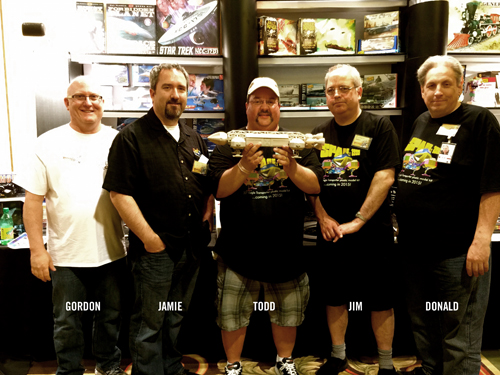
As mentioned last post, this show will always be pretty memorable to me. I had the pleasure of hosting Jim Small and his pal, Donald Hayunga, who stopped in to visit Round 2 then accompanied us for the rest of the trip. Once they wiped their chins after seeing our repository of archived model kits, I put them to work on a few prep items for the show including touching up the Eagle mockup which had been slightly damaged on its way here from China. We then headed out a day early to take a trip to the National Museum of the U.S. Air Force in Dayton. I was a bit let down with this year’s trip there as we purposefully went on Friday to see the restoration wing and Presidential aircraft which is only available to be seen on that day, but security levels prevented visitors form going on the base where the hangars are. It looks like the fourth wing of the museum should be finished next year and all of those aircraft will be moved into the new wing.
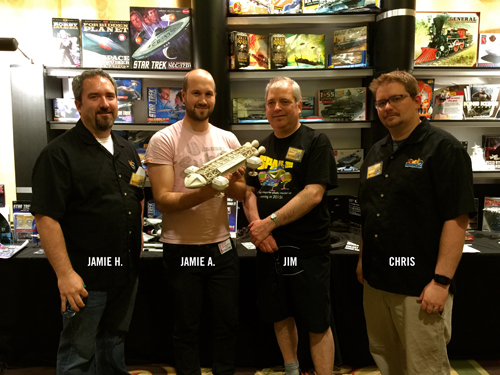
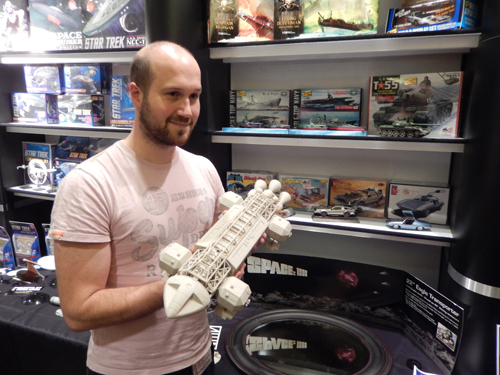
With the extra help, set up went quickly and afterwards, we had dinner with a couple Space:1999 Facebook fan page managers Todd Morton and Gordon Moriguchi. Somehow, they had sneaking suspicions that we might be announcing the Eagle at the show. It was a pleasure to meet the guys and hang out at the show. We had visitors to the booth like Star Trek gurus Gary Kerr and Rick Sternbach, but the Eagle fans were especially excited when Gerry Anderson’s son, Jamie and BSG production designer Eric Chu stopped by to pose for pictures with the Eagle mockup.
I’ll touch on some of the other stuff we had on display in a future post, but I didn’t want to take too long before addressing one question that came up a couple times. A few kind folks wanted to know what’s happening with the Galileo Shuttle model kit. The honest truth is that we are looking to put it out in 2016 as part of the 50th anniversary celebration of Star Trek: The Original Series. Is waiting for the anniversary the only reason for the delay? No. As with all delays, there are many factors involved that would include “business” in that that kit is not our only concern company wide. Other unrelated circumstances and opportunities pop up and sometimes we have to take advantage of them. In other ways I can honestly say “life & death” have gotten in the way a little bit on this project on many levels. I don’t feel it is appropriate to get into any of the details. Can I promise that the Galileo will come out in 2016? I am not in the position to promise anything. I can’t predict the future. I can only proceed and work and fight until I’m told not to. Why do the Eagle now and not do the Galileo? When we examined all of the costs and possibilities, we felt that the Eagle was the better kit to do right now. As I’ve said before, I really appreciate everyone that has been reasonable about this. To those that have gotten a bit… testy… about it, well… Thanks for your interest too.
Round 2 Models: Wonderfest 2015 Space:1999 Eagle Announcement
This year’s Wonderfest will be one to remember for me I’m sure. It may rival the shows where we announced or showed our 1:350 scale TOS U.S.S. Enterprise. The trip was fun all around. Instead of doing one long post about the show, I’m going to split up some topics through a few posts and I’ll put them up over the next few weeks. (no… really… I mean it this time. I’ve already written them. I just need to “publish” them…) I’ll cover the “big news” in this one.
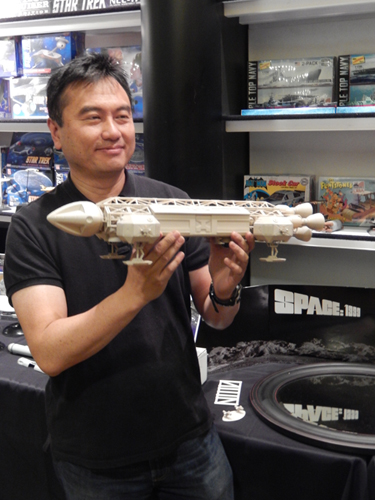
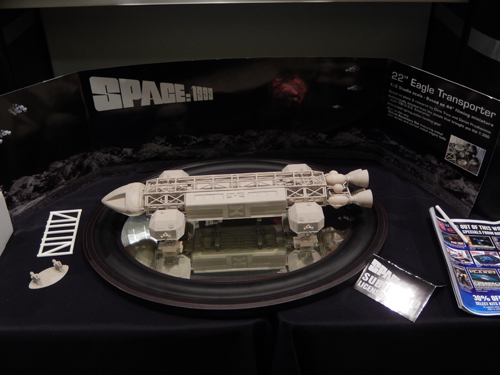
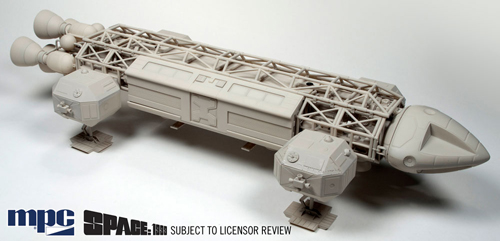
I think most attendees were (happily) surprised to see the main attraction at our booth this year was a mockup of our upcoming Space:1999 Eagle Transporter. It’s a bit shy of 22” long and is based on the 44” filming miniature. Our team of consultants on the kit is comprised of Jim Small, Daniel Prud’homme who supplied the CAD model and Chris Trice. The model features spring-loaded landing gear and comes injected in white and gray with clear windows. The only interior details will be the pilot figures with a back wall in the nosecone. The retail price is targeted at about $100, but that will vary by retailer. I understand some have already started taking preorders. I’ll post more pics of the mockup later on.
One other thing to mention… Some people get confused when they see “subject to licensor review” like they saw on the little sign next to the mockup. In some cases, we put that statement on there voluntarily and sometimes it is required by the licensor. The true meaning of that can vary, but it essentially means what it says. The licensor has the right to review the product and can ask for changes from what you see. It has nothing to do with “permission” to make a product. The licensor is aware that it is being developed, and the rights to manufacture it have already been resolved through the licensing agreement. In an ideal world, the licensor would have had a chance to review it before we put it on display, but in this particular case the mockup arrived on my desk about a week before the show. Since I was busy prepping for that I never had time to properly photograph it to send to the licensor for their approval of it.
Round 2 models: 1989 Batmobile
Hi guys. I know it has been a while since I have posted. My only excuse is my usual one of just not being able to find the time. Still, I feel guilty for not finding at least something quick to show you. So, I’m going to try to at least do a quick post every couple of weeks. It will be a sign of life at least. Wonderfest is coming up and I didn’t want to miss making the point that we’ll be there once again to meet face to face to talk about any of the sci-fi products we offer.
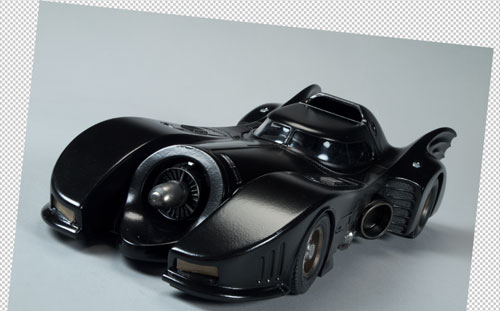
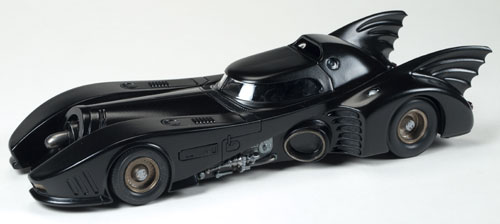
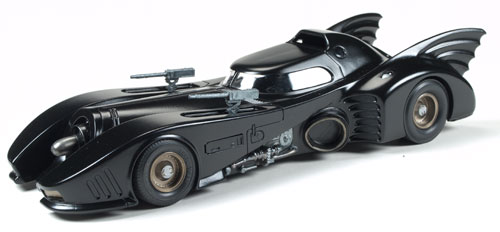
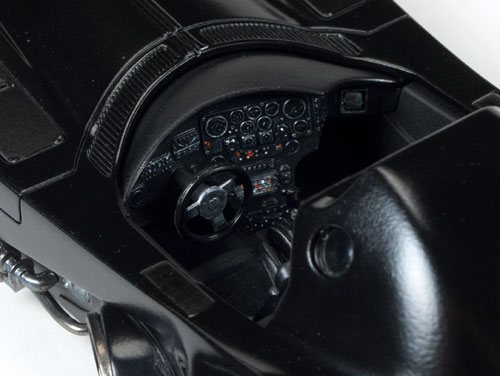
I recently got in a time pinch (can you believe it?). Our usual go-to car modeler, Mike Wherry, got buried in a small rush of buildup work and I was in need of a buildup of the AMT1989 Batmobile which will be coming out later this summer. I gave the kit a quick look and did a little poking around on the net to see what others had done with it. Eventually, I got to the point where I thought to myself, “Ya know. it isn’t a really complex kit. The car is all shades of black with some steel accents. Maybe I could build it myself and I could have it done in a couple weeks.” So I did.
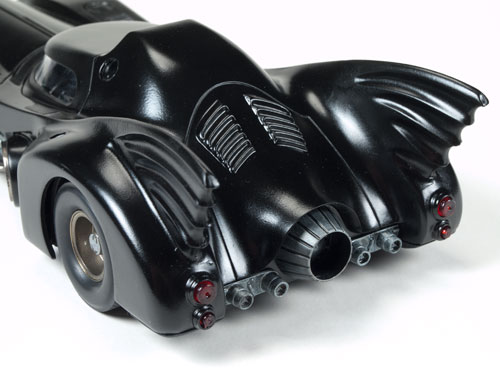
When I was a kid, I usually built cars and I left the hobby behind after getting frustrated with assembling engines that I never truly understood and with getting runs in the body paint. My younger brother on the other hand loved to chop tops and do mods to his cars. I couldn’t compete, so I built a couple jets and a couple of my dream cars before moving on to other things. The first Burton Batman film came out in the summer after my senior year in high school, and as a Batman fan I was a completist. So I bought and built an ’89 Batman kit when they first came out. So, as I was thinking about this build, I had vague memories of that one in mind. I remembered having to fill the seams in the tail fins and that there was a pull out turbine engine (only to relearn later that the pull-out feature was added to the Batman Returns edition which I would later buy). As you may know, I rarely build models to completion, but I fully understand the concepts and techniques used to build and finish them. The materials available these days and my ability to airbrush would give me a huge advantage over my younger attempt.
How did it go, you ask? Well enough for what I needed it for. I ran into the same problem I had as a youngster in that I got a little impatient with the spray paint (in this case a Testors lacquer). The first coat went down the best, but it didn’t cover 100% and my seams were still showing through. The second coat had runs and orange peel, so I sanded a bit and hit it again and a bit of orange peel remained, and some details started filling in, but it covered well enough and figured I could help the surface irregularity in Photoshop when I used it on the packaging. I’m sure that more practice with a rattle can would have gone a long way. If I had all the time in the world, and really wanted to do an outstanding job, I would have decanted the paint and ran it through my airbrush to get much better control.
The interior turned out well enough though. I left the seat unpainted black plastic as I felt the sheen and color looked like vinyl or black leather. I hit some bits with flat black for contrast and try brushed the dials lightly enough to have them stand out, but not look heavy handed. I decided to hide most of the chrome to make it look more like the real thing. It was good enough to do the job, but I have nothing on the skills of someone like Mike Wherry.
It wasn’t until I was finished with my build that I realized that the last model I ever built and painted to completion was the same kit. Two builds nearly 25 years apart, and having done none (in styrene at least) in between. Anyway, I figured I would share the fruits of my labor. I’ll see if I can dig out my old build. I’m sure I’ve still got it in a box somewhere.
The first pic shows an unaltered pic of the buildup. The second shows how I plan to incorporate it into the box lid (pending licensor approval). The rest of the pics show a few other angles of the buildup.